Set up a GPU with a virtual machine
Learn how to set up and configure GPUs with your virtual machines in Katapult. This guide covers adding GPUs to new or existing virtual machines, understanding attachment behavior, and configuring drivers for optimal performance.
Katapult offers high-performance GPU options to accelerate specialized workloads:
- Nvidia L4 (24 GB) - Latest generation GPU ideal for AI inference, machine learning training, and high-performance computing
- Nvidia T4 (16 GB) - Versatile GPU perfect for machine learning inference, video processing, and general compute acceleration
GPUs can be added during virtual machine creation or attached to existing virtual machines
Prerequisites
Before setting up a GPU with your virtual machine, ensure you have:
- An active Katapult account with appropriate permissions
- A Katapult virtual machine
- Basic familiarity with SSH access to virtual machines
- Understanding of your specific GPU workload requirements
Adding a GPU to a new virtual machine
When creating a new virtual machine, you can include a GPU as part of the initial configuration.
-
In the Katapult Console, click Launch new virtual machine.
-
Complete the standard configuration steps (location, package, operating system).
-
In the Add a GPU section, select your preferred GPU:
- Nvidia L4 (24 GB)
- Nvidia T4 (16 GB)


-
Review your configuration and pricing.
-
Click Launch Virtual Machine.
The GPU will be attached during the virtual machine provisioning process and will be available immediately upon boot.
Adding a GPU to an existing virtual machine
You can attach a GPU to an existing virtual machine at any time. This process may require powering off the virtual machine depending on your current configuration.
Check virtual machine state
Before attaching a GPU:
- Navigate to your virtual machine in the Katapult Console.
- Check the current power state in the virtual machine details.
- Note any existing GPU attachments.
Attach the GPU
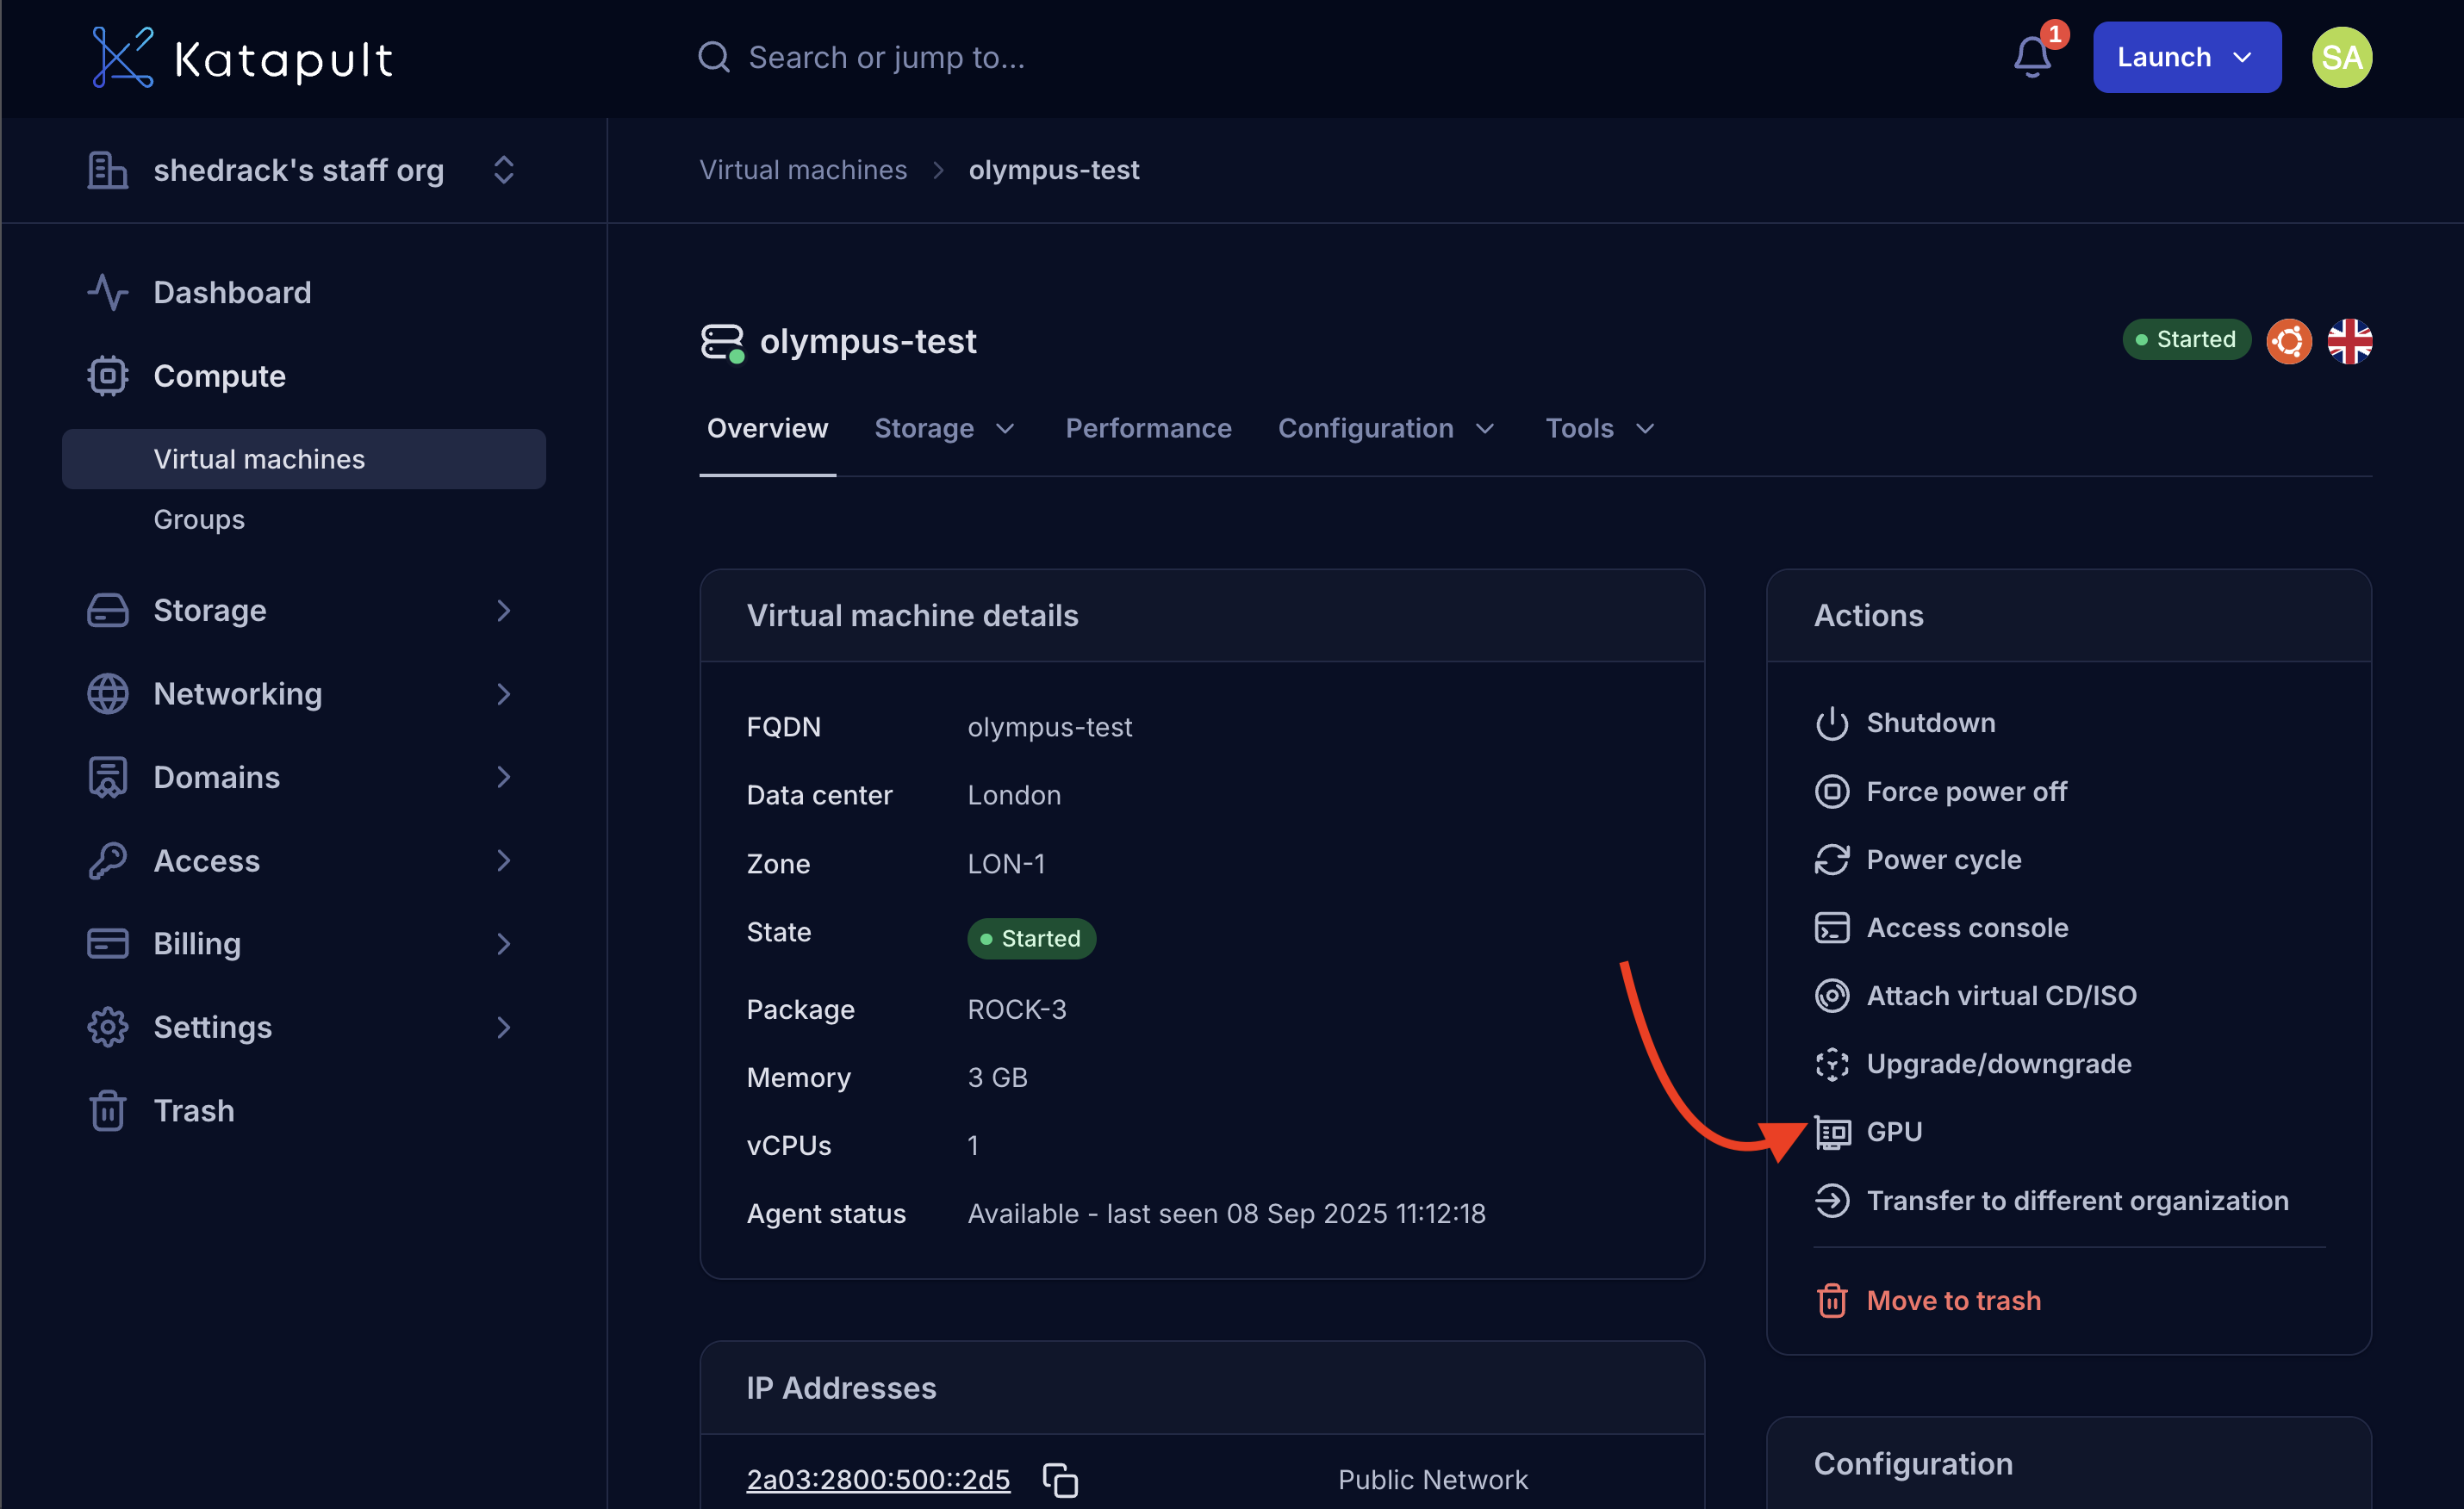
To attach a GPU to your existing virtual machine, follow these steps:
- From the virtual machine details page, in the Actions menu, select GPU.
-
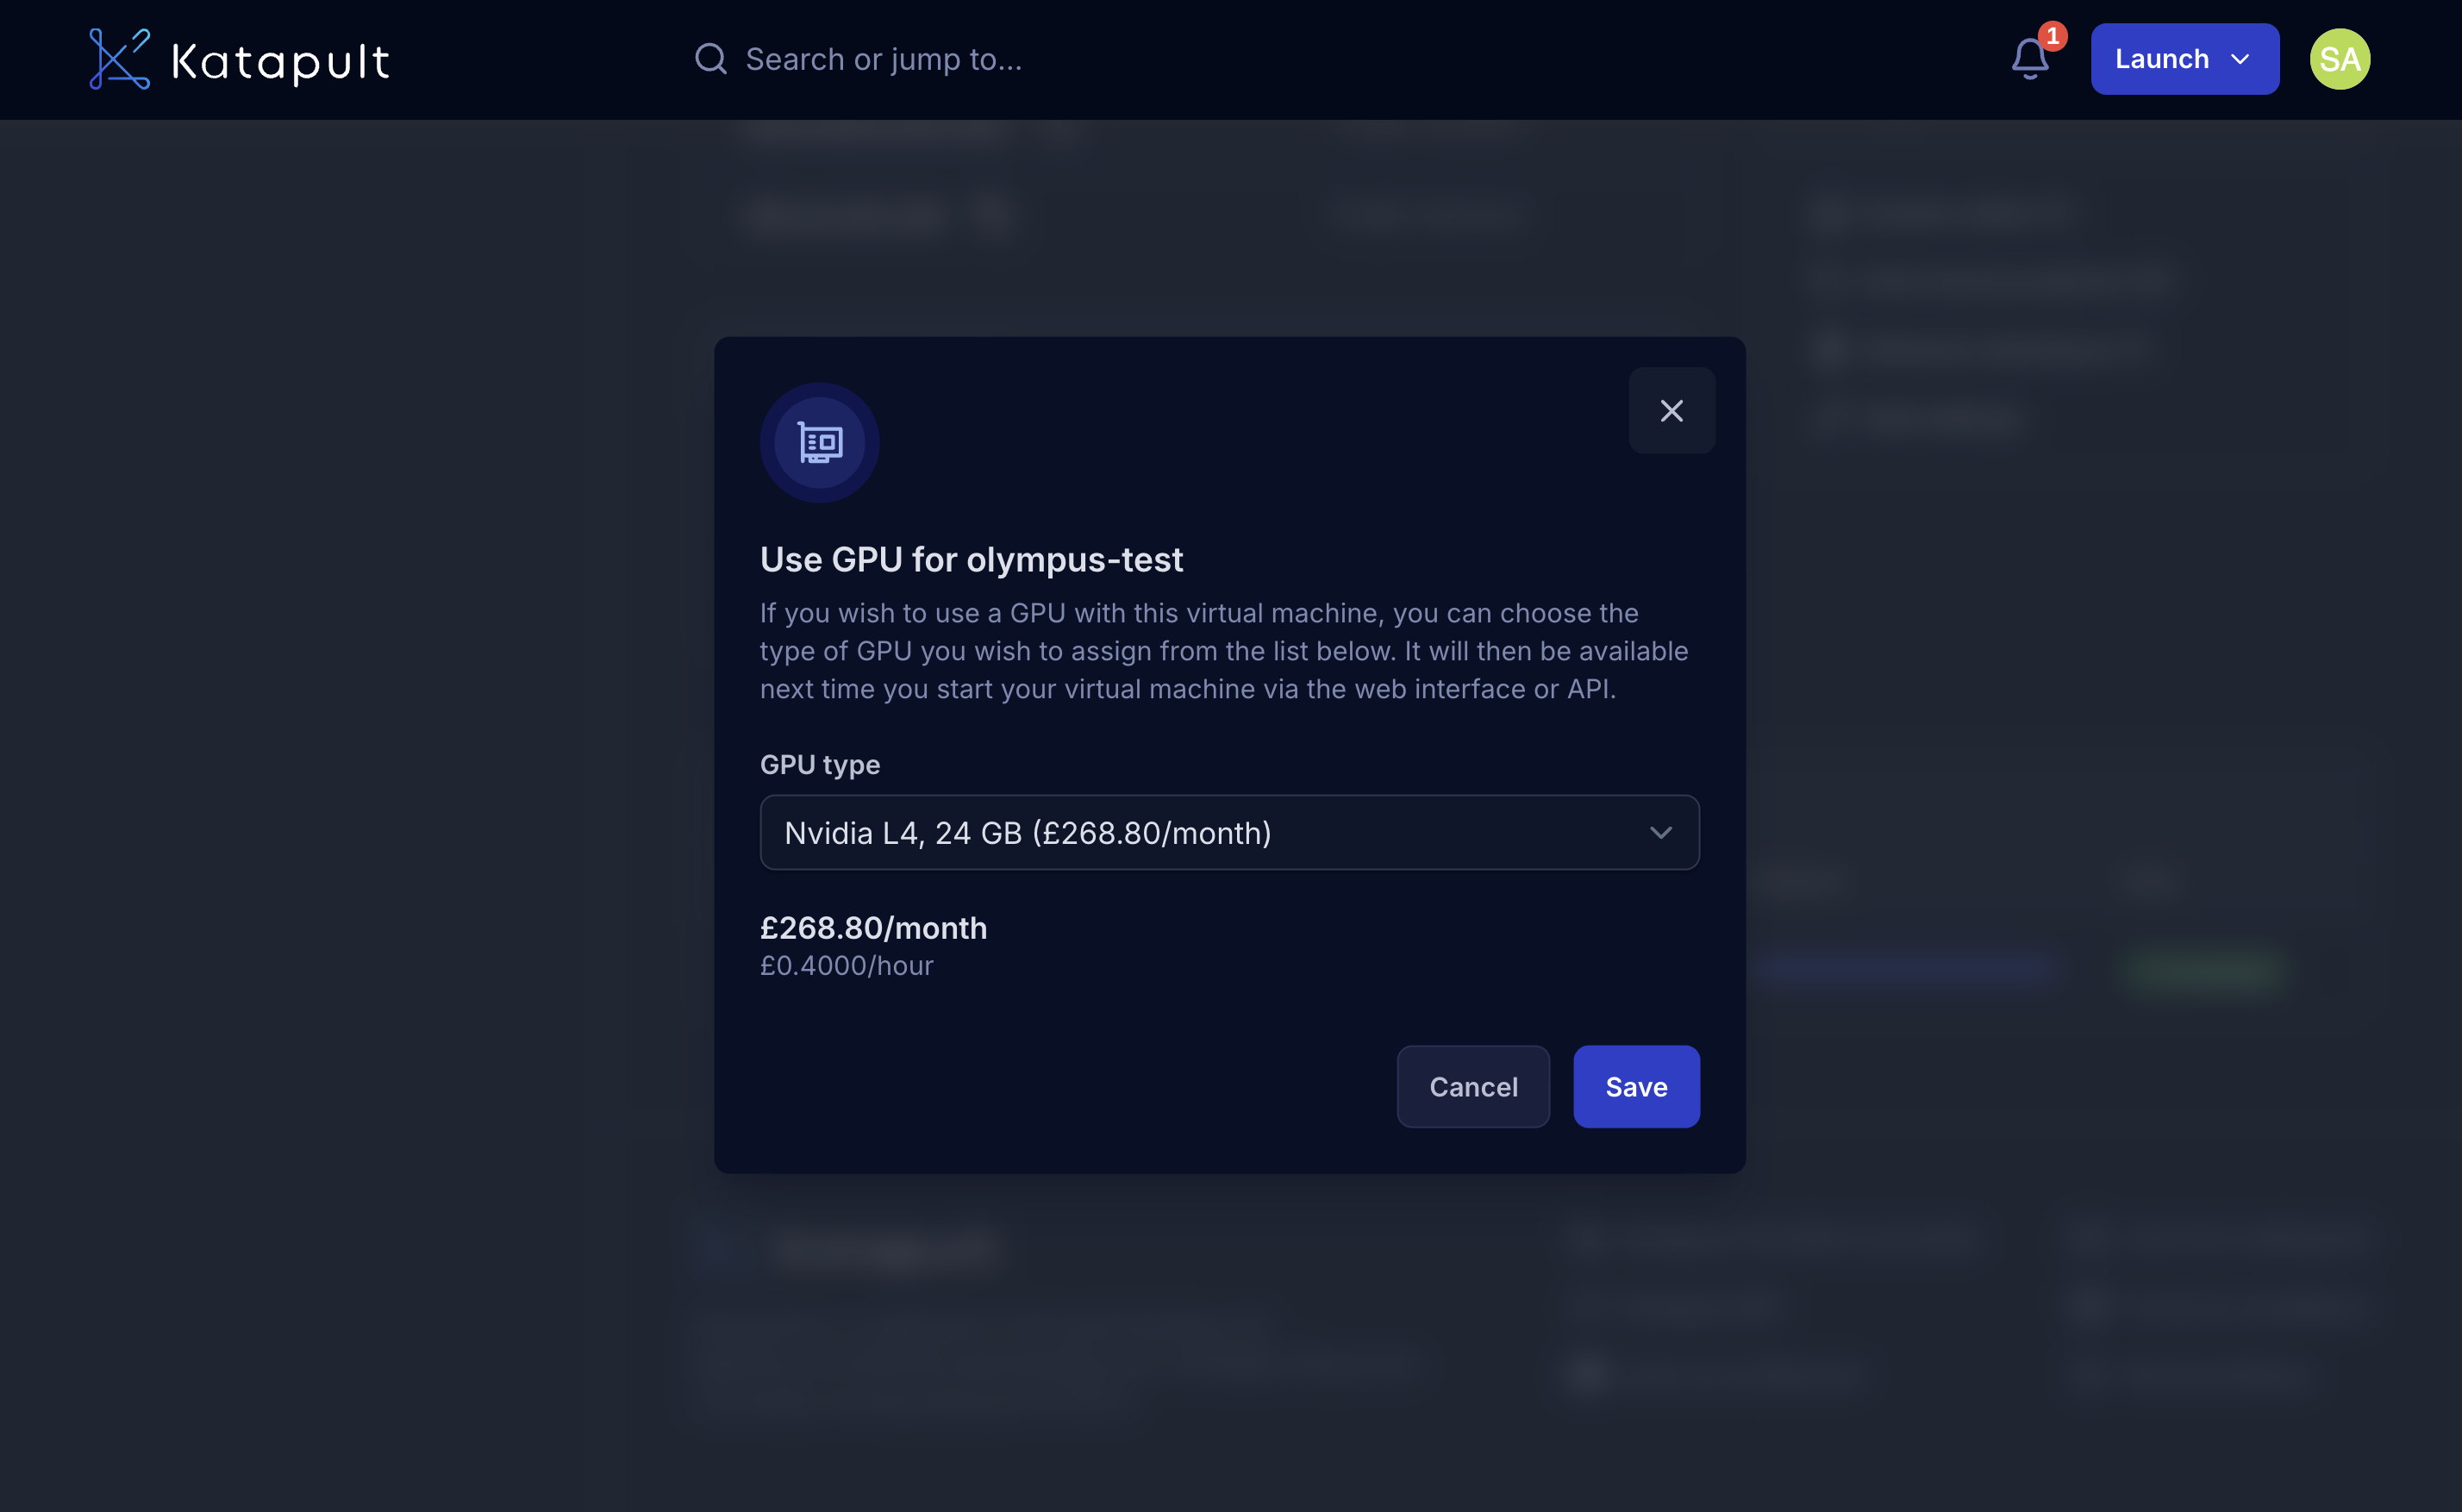
Choose your preferred GPU option:
- Nvidia L4 (24 GB)
- Nvidia T4 (16 GB)
-
Review the cost.
-
Click Save to confirm.
- Reboot your virtual machine to finalize the GPU configuration and ensure all changes take effect.
- The virtual machine must be rebooted for the GPU attachment to take effect
- Katapult handles the hardware attachment during reboot
- After restart, the OS automatically detects the new GPU hardware
- If drivers are already installed, the GPU becomes immediately available
- The system assigns PCIe resources to the new GPU
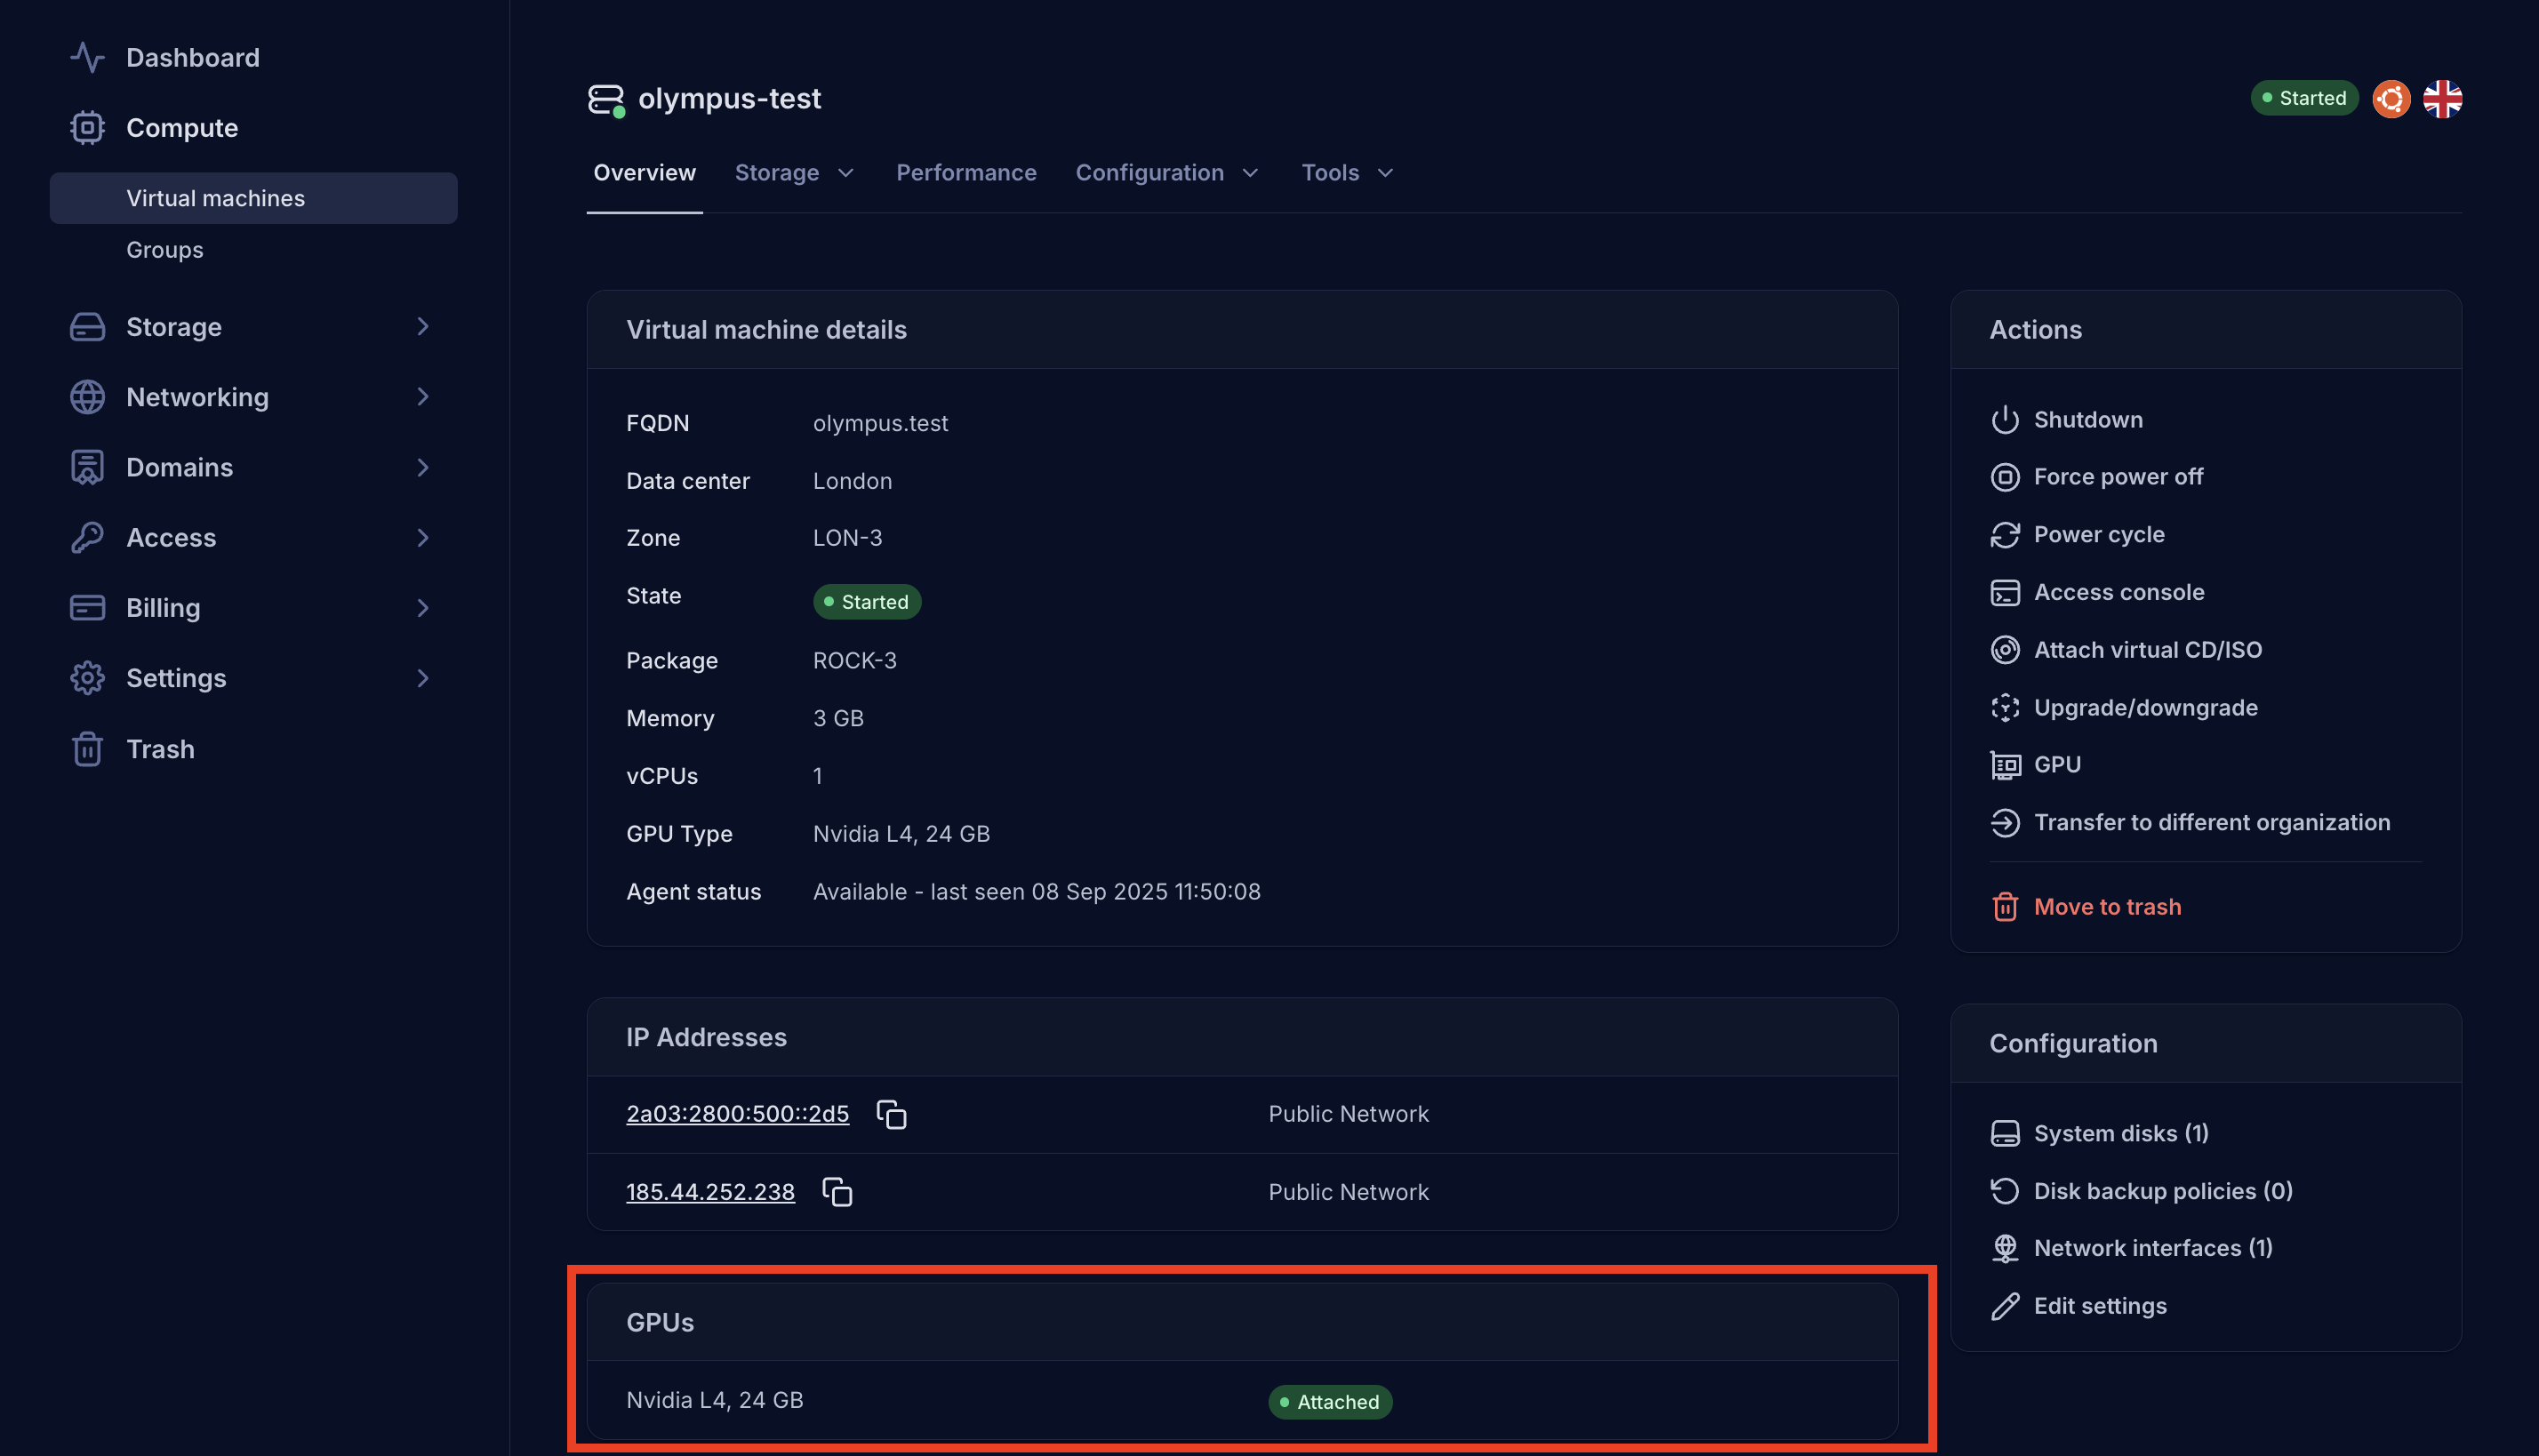
- After rebooting, if the attachment is successful, the attached GPU will appear on the VM details page in the Katapult dashboard:
Detaching a GPU
If you need to remove a GPU from your virtual machine:
-
From the virtual machine details page, in the Actions menu, select GPU.
-
In the GPU dropdown, select No GPU.
-
Click Save to confirm the change.
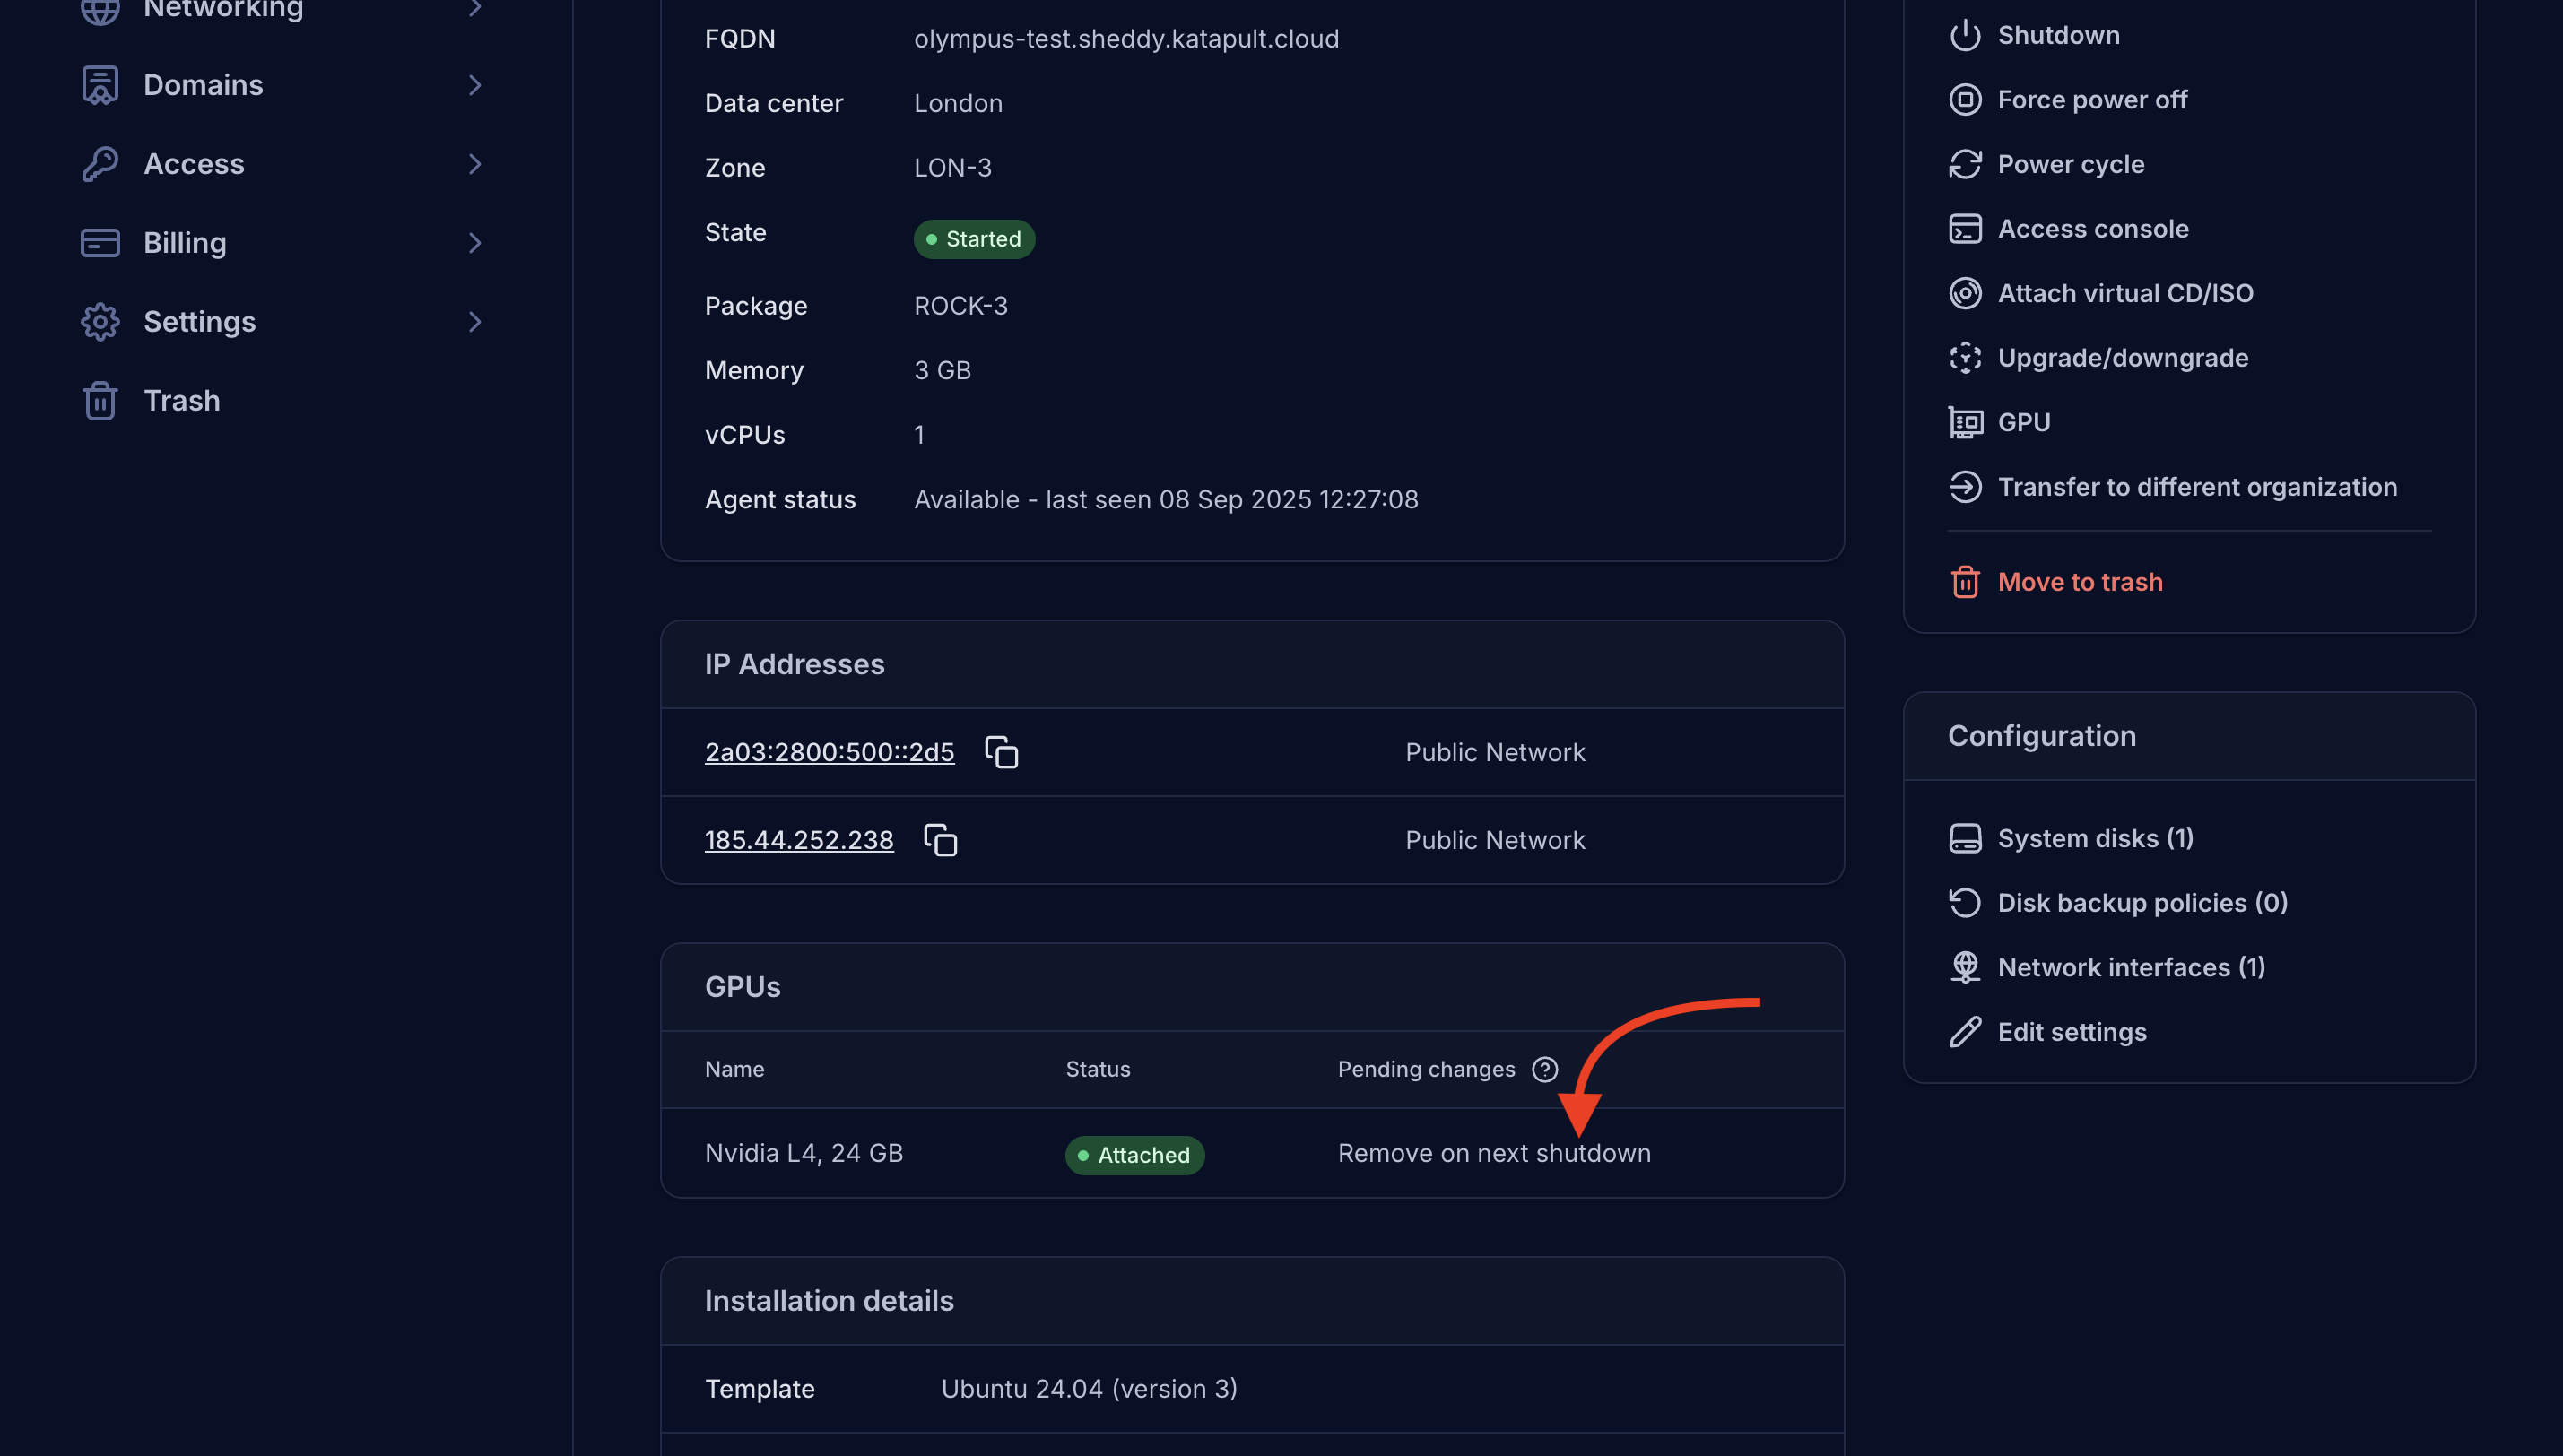
-
The GPU section in the VM details page will show a "Remove on next shutdown" message in the Pending changes column.
-
Shutdown the VM and restart it to complete the GPU detachment.
- The virtual machine must be powered off before the GPU can be safely detached
- Any running processes using the GPU will be stopped during shutdown
- GPU memory and compute resources are automatically released
- Katapult safely removes the GPU from the VM's hardware configuration
- The VM restarts without the GPU, and the system adjusts accordingly
After reboot, the GPU will be completely removed from your virtual machine configuration.
Driver setup
Proper GPU drivers are essential for optimal performance and functionality.
Finding recommended drivers
Before installing drivers, it's important to identify the recommended driver version for your specific GPU and operating system:
Check available driver versions
-
For Ubuntu/Debian systems, search for available NVIDIA drivers:
sudo apt update
ubuntu-drivers devices
This command will show your GPU and list recommended driver versions.
-
For CentOS/RHEL systems, check available drivers:
sudo dnf search nvidia-driver
NVIDIA's official recommendations
Visit NVIDIA's driver download page to:
- Select your GPU model:
- Product Category: Data Center / Tesla
- Product Series: L or T Series
- Select the Product: L4 or T4
- Choose your operating system
- View the latest recommended driver version
- Access release notes and compatibility information
Version compatibility
- Nvidia L4: Requires driver version 525.xx or newer
- Nvidia T4: Compatible with driver versions 418.xx and newer
- CUDA compatibility: Check NVIDIA's CUDA compatibility matrix if you plan to use CUDA
Ubuntu/Debian systems
-
Connect to your virtual machine via SSH.
-
Update the package manager:
sudo apt update && sudo apt upgrade -y -
Install the NVIDIA driver repository:
wget https://developer.download.nvidia.com/compute/cuda/repos/ubuntu2204/x86_64/cuda-keyring_1.1-1_all.deb
sudo dpkg -i cuda-keyring_1.1-1_all.deb
sudo apt update -
Install the NVIDIA drivers (using the recommended version):
# Install the system-recommended driver (recommended approach)
sudo ubuntu-drivers autoinstall

# OR install a specific version (replace XXX with version number)
sudo apt install nvidia-driver-XXX -y -
Reboot the virtual machine:
sudo reboot
CentOS/RHEL systems
-
Connect to your virtual machine via SSH.
-
Enable the EPEL repository:
sudo dnf install epel-release -y -
Install the NVIDIA repository:
sudo dnf config-manager --add-repo https://developer.download.nvidia.com/compute/cuda/repos/rhel9/x86_64/cuda-rhel9.repo -
Install the NVIDIA drivers:
sudo dnf install nvidia-driver nvidia-settings -y -
Reboot the virtual machine:
sudo reboot
Special configuration for L4 GPUs
Nvidia L4 GPUs require specific kernel parameters when used with Ubuntu systems to ensure proper PCIe functionality.
Ubuntu GRUB configuration
If you experience issues with L4 GPU detection on Ubuntu, such as the following error messages in dmesg or boot logs:
gsp: init failed, -110
nouveau: DRM-master: Device allocation failed: -110
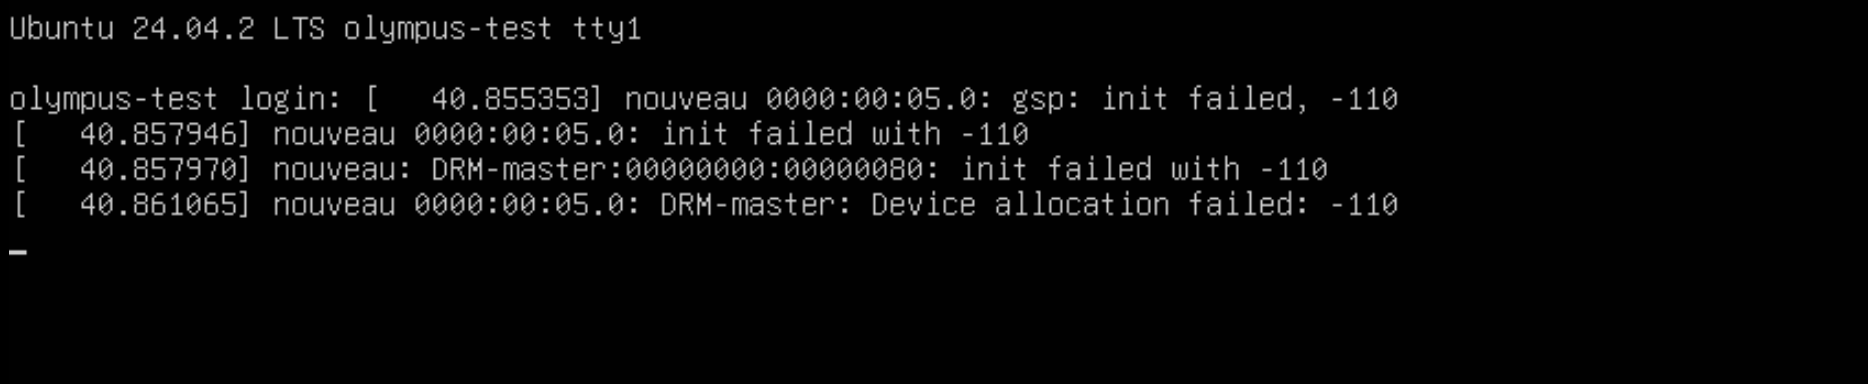
These errors indicate PCIe resource allocation conflicts. Add the pci=nocrs kernel parameter to resolve this:
-
Connect to your virtual machine via SSH.
-
Edit the GRUB configuration:
sudo nano /etc/default/grub -
Locate the
GRUB_CMDLINE_LINUX_DEFAULTline and addpci=nocrs:GRUB_CMDLINE_LINUX_DEFAULT="pci=nocrs" -
Update GRUB:
sudo update-grub -
Reboot the virtual machine:
sudo reboot
Why this configuration is needed
The pci=nocrs parameter disables the use of the ACPI _CRS (Current Resource Settings) method for PCIe resource allocation. This resolves compatibility issues between the L4 GPU's advanced PCIe features and certain Ubuntu kernel configurations.
Verification
After setting up your GPU, verify it's working correctly:
Check GPU detection
-
Verify the GPU is detected by the system:
lspci | grep -i nvidia -
Check NVIDIA driver status:
nvidia-smi -
Verify GPU memory and utilization:
nvidia-smi -q -d MEMORY
Test GPU functionality
-
Run a simple GPU computation test:
nvidia-smi -q -d PERFORMANCE -
For CUDA workloads, verify CUDA installation:
nvcc --version
Your GPU is now ready for specialized workloads including machine learning, AI inference, video processing, and high-performance computing tasks.