Attach an ISO to a virtual machine
Learn how to attach ISO files to your virtual machines in Katapult. This guide covers uploading ISOs, attaching & detaching them to virtual machines for custom operating system installations, software deployment, or system recovery tasks.
Prerequisites
Before attaching an ISO to your virtual machine, ensure you have:
- An active Katapult account
- A virtual machine in your Katapult organization
- An ISO file ready to upload
Upload an ISO file
If you do not want to use the Katapult-provided ISOs, you'll need to upload it first.
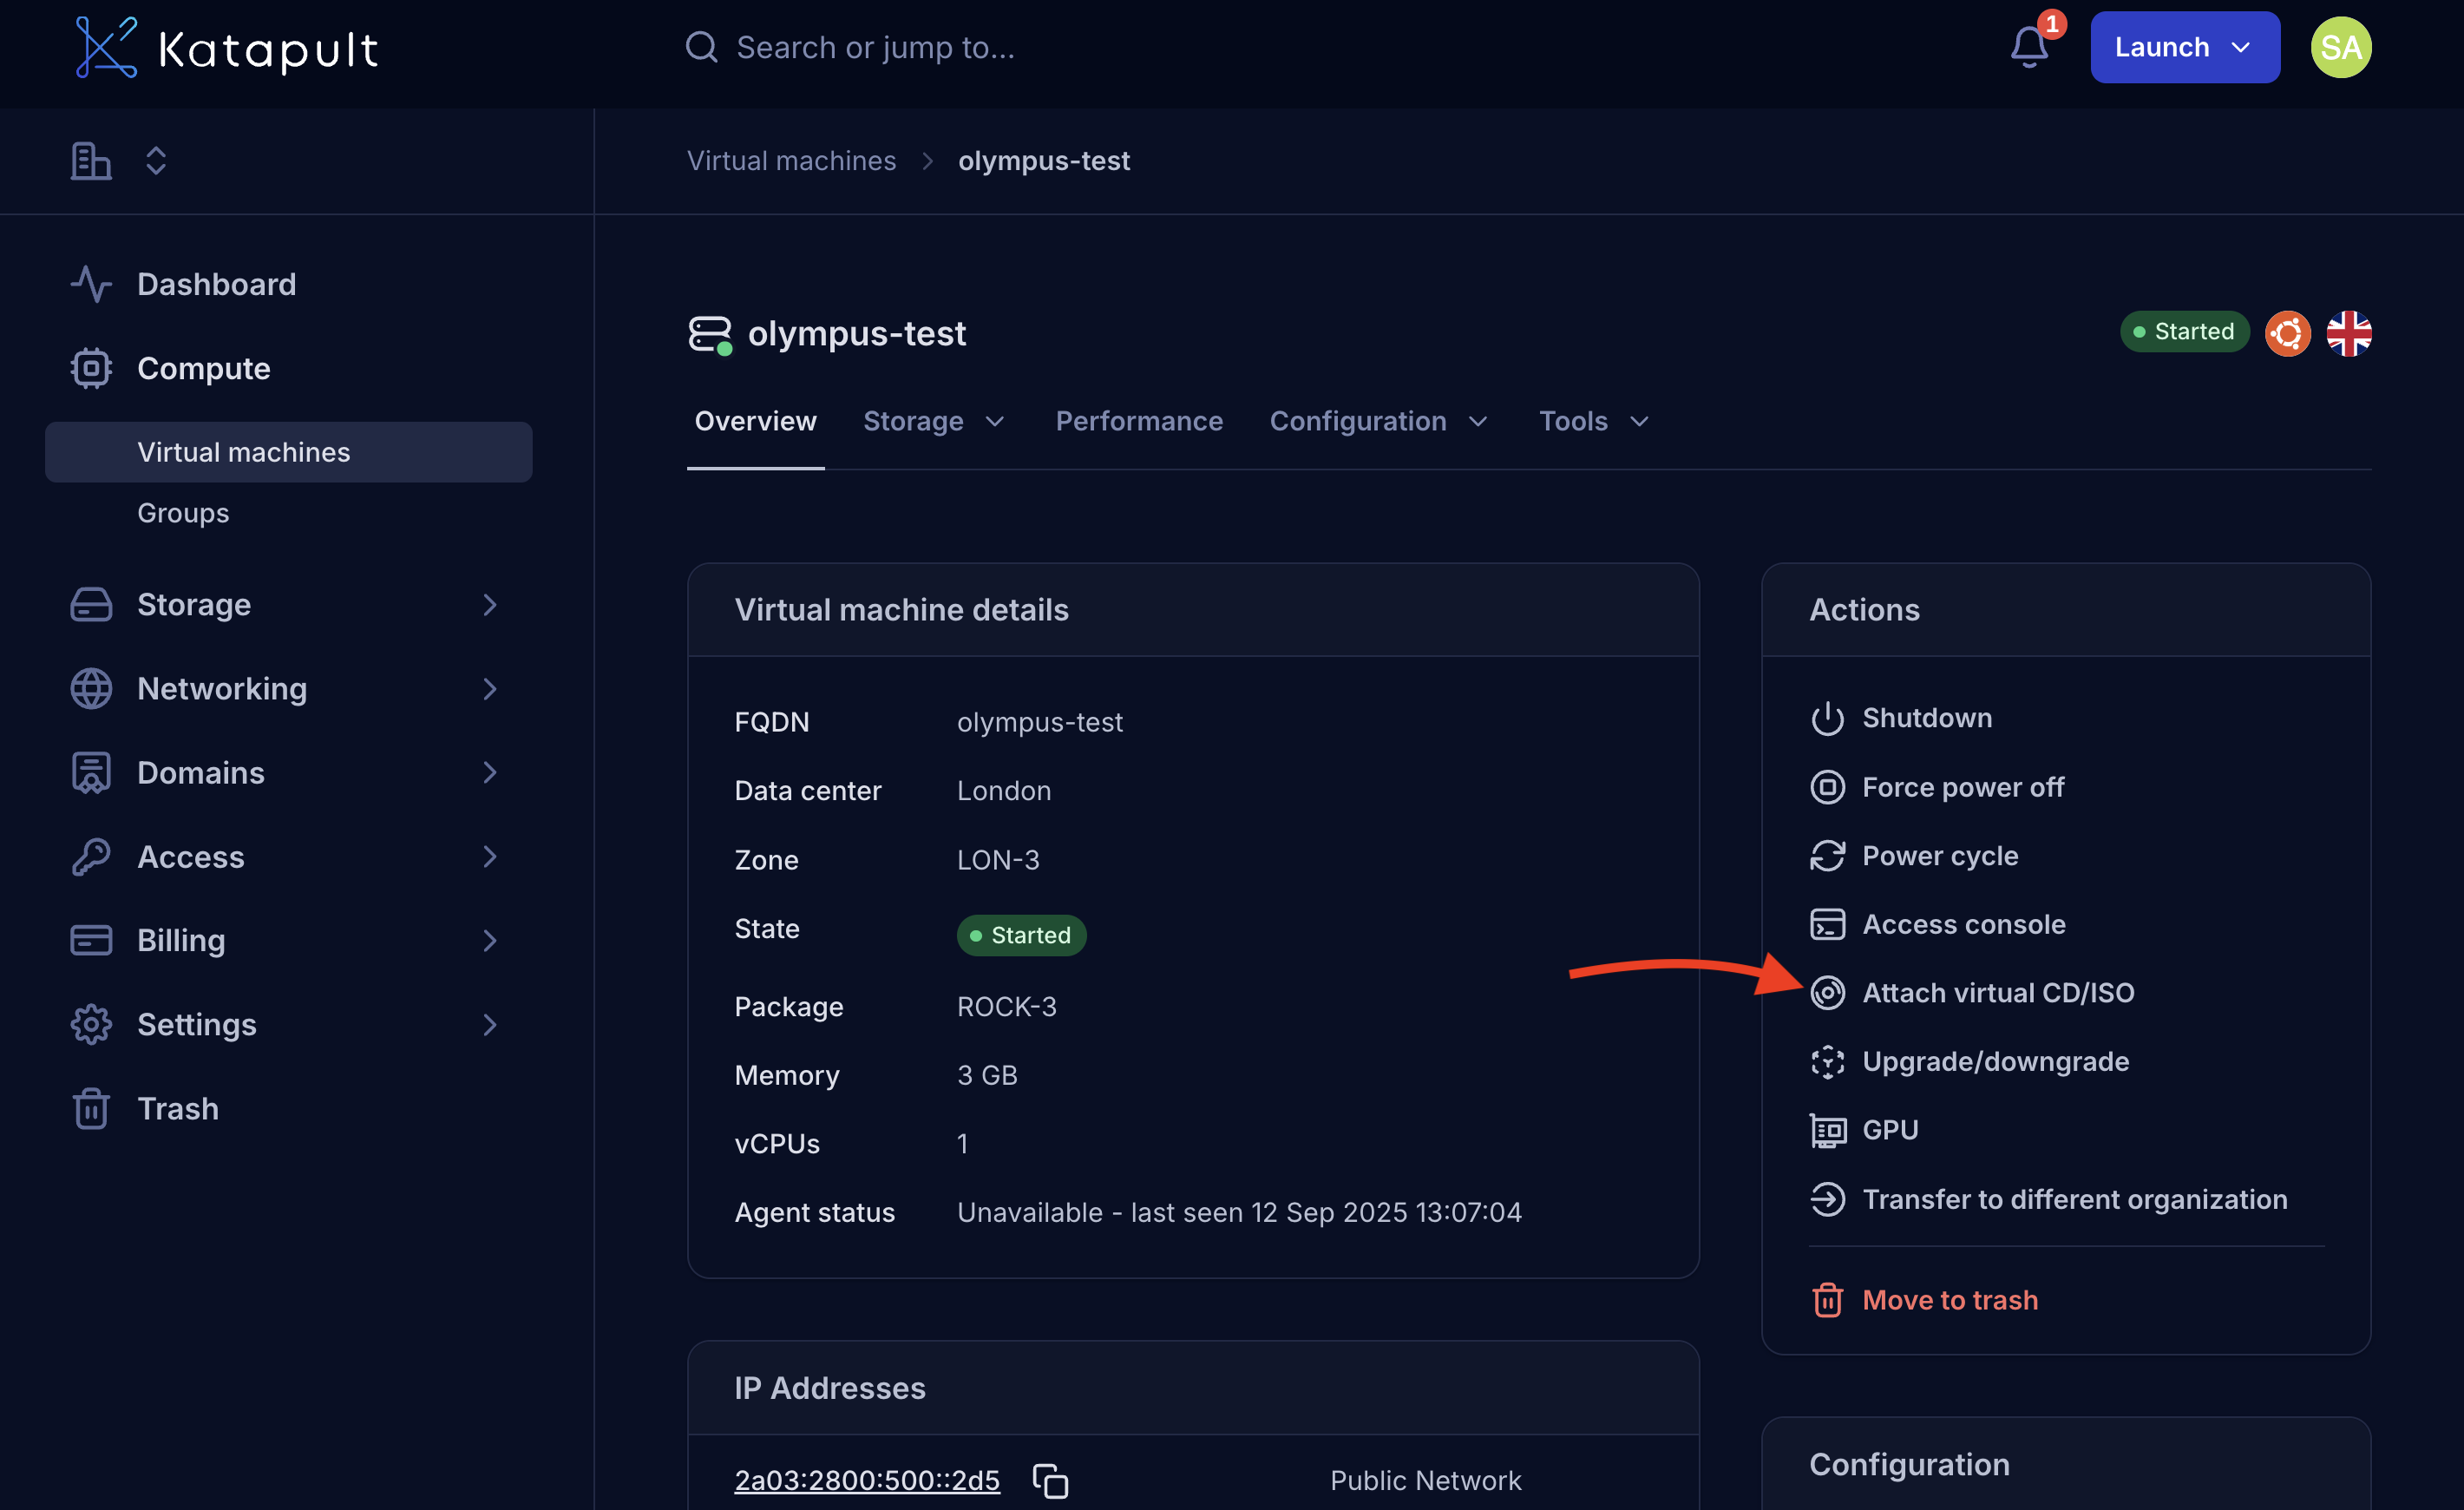
- In the Katapult Console, navigate to Compute > Virtual Machine.
- Select your preferred VM
- Click on the Attach virtual CD/ISO button in the VM overview page
- Click Add New ISO.
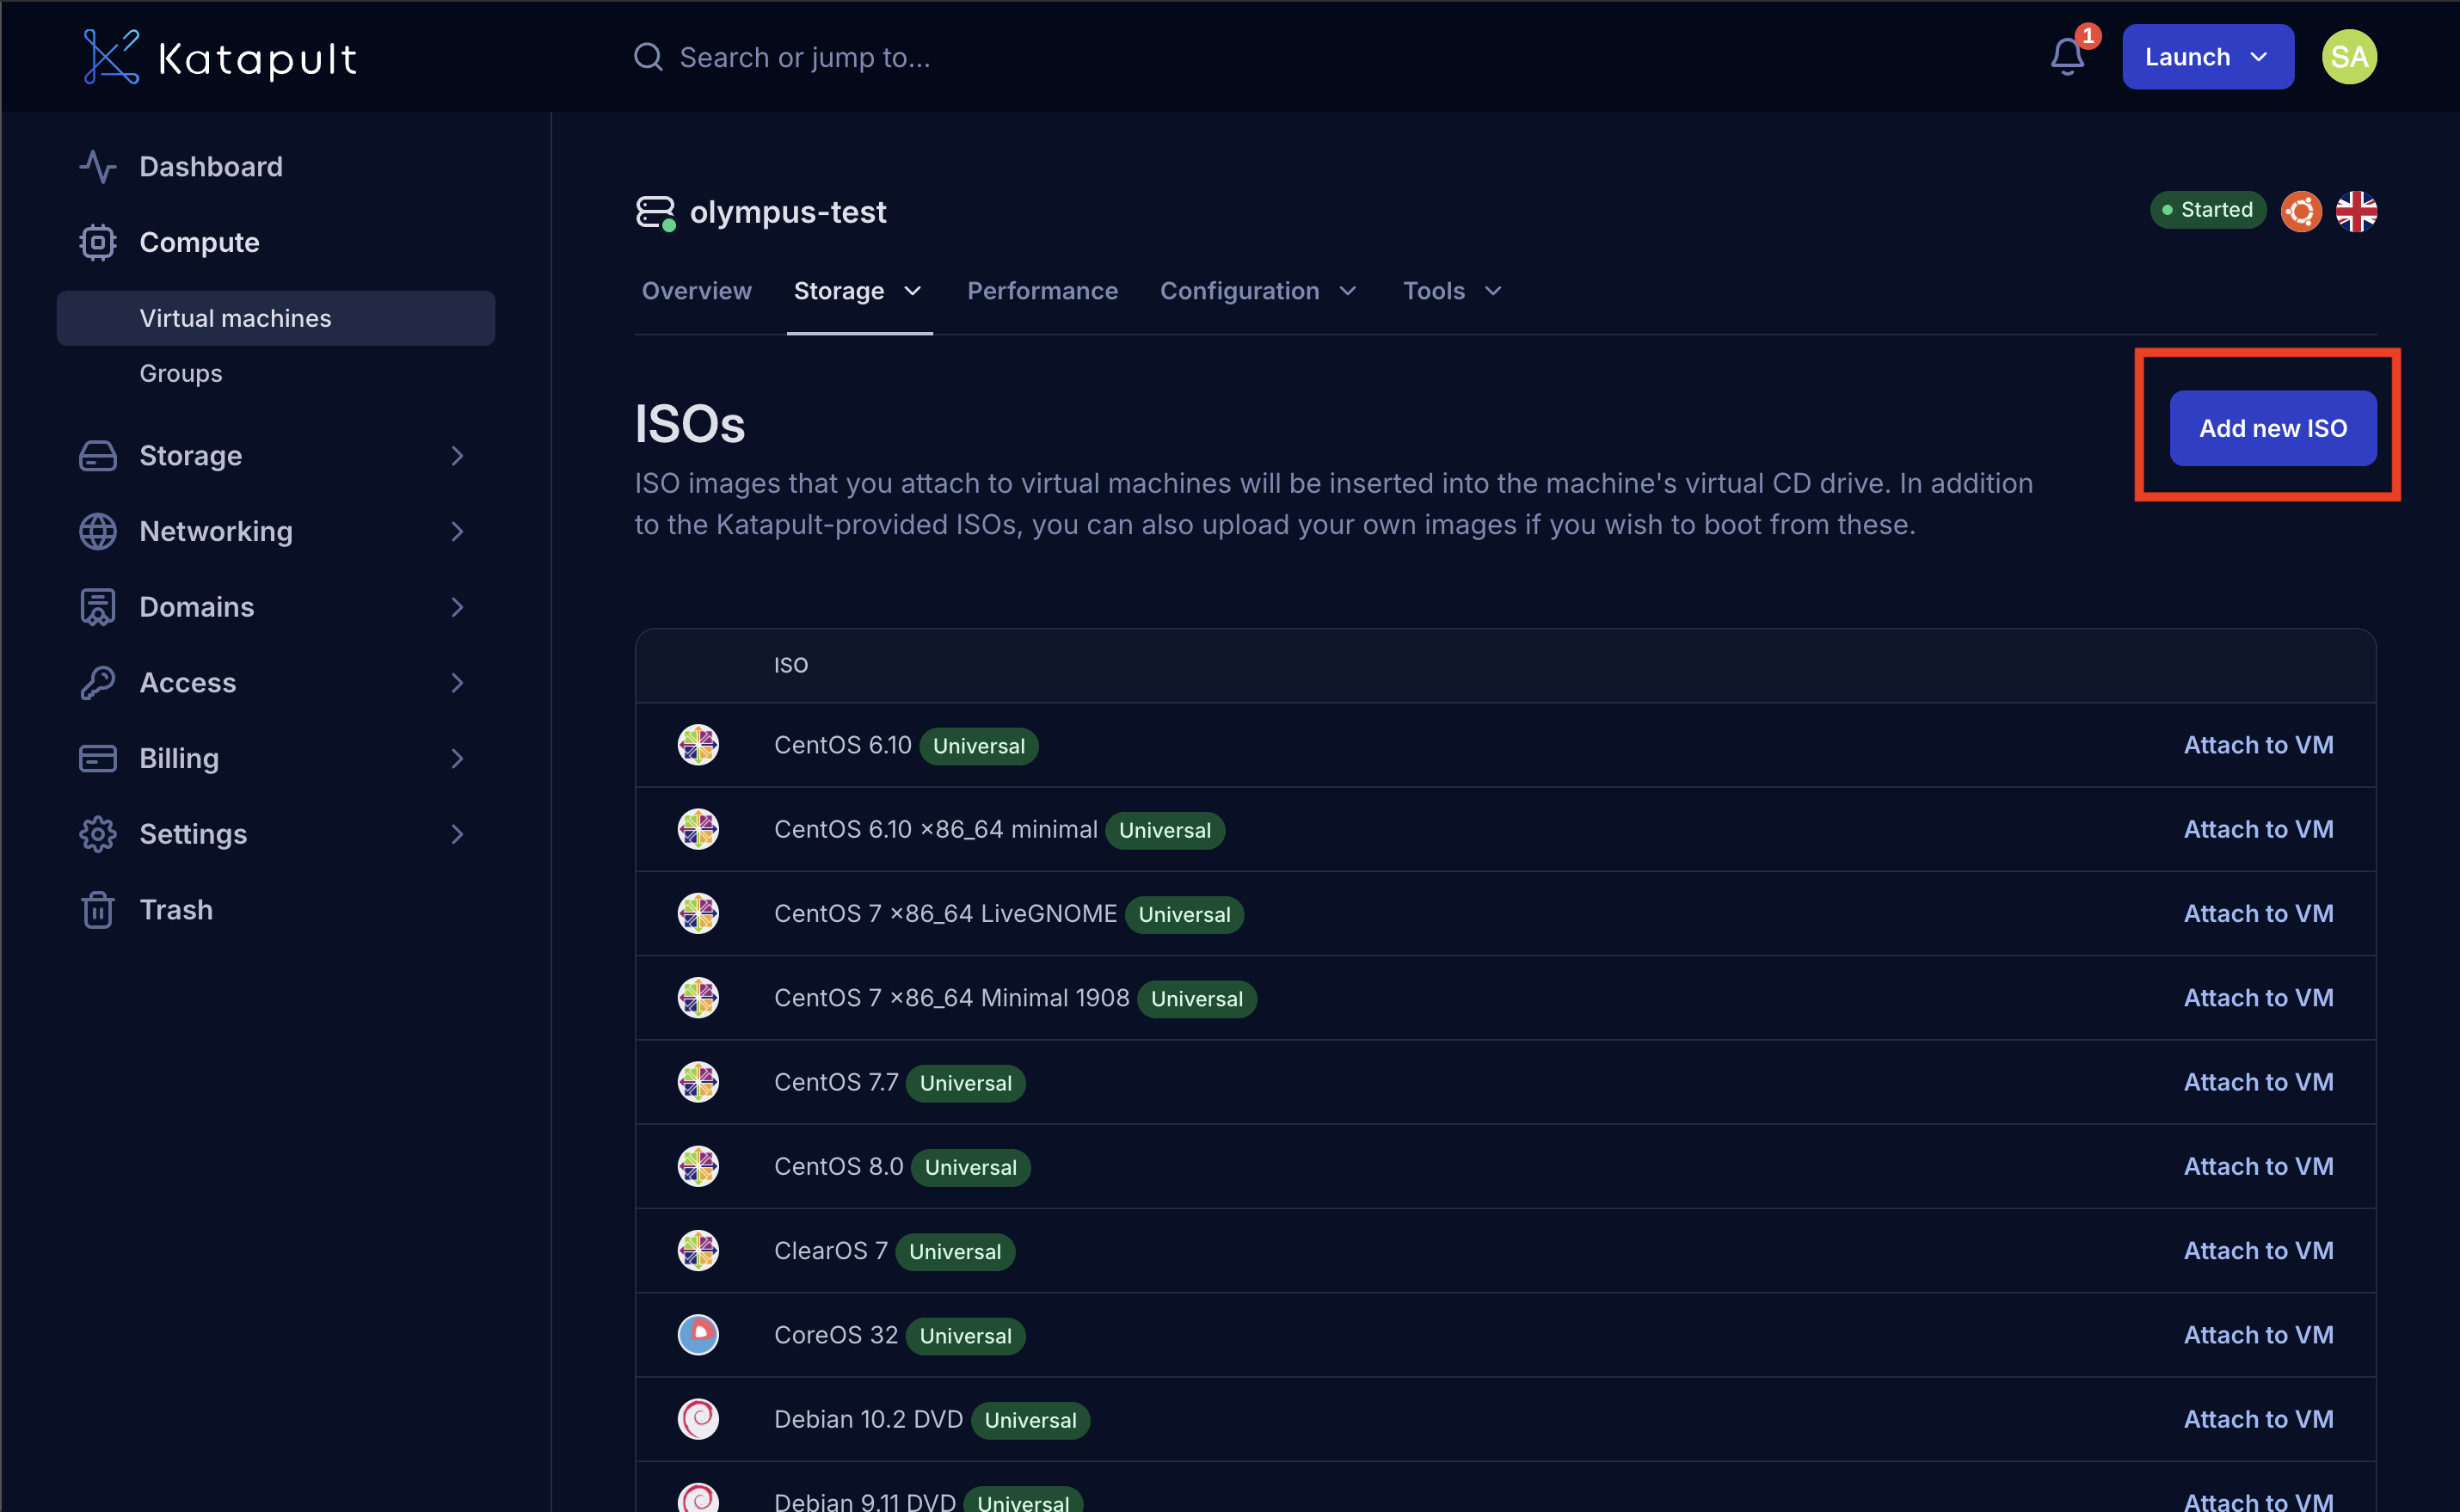
- In the Create a new ISO dialog, you'll see two options for uploading your ISO:
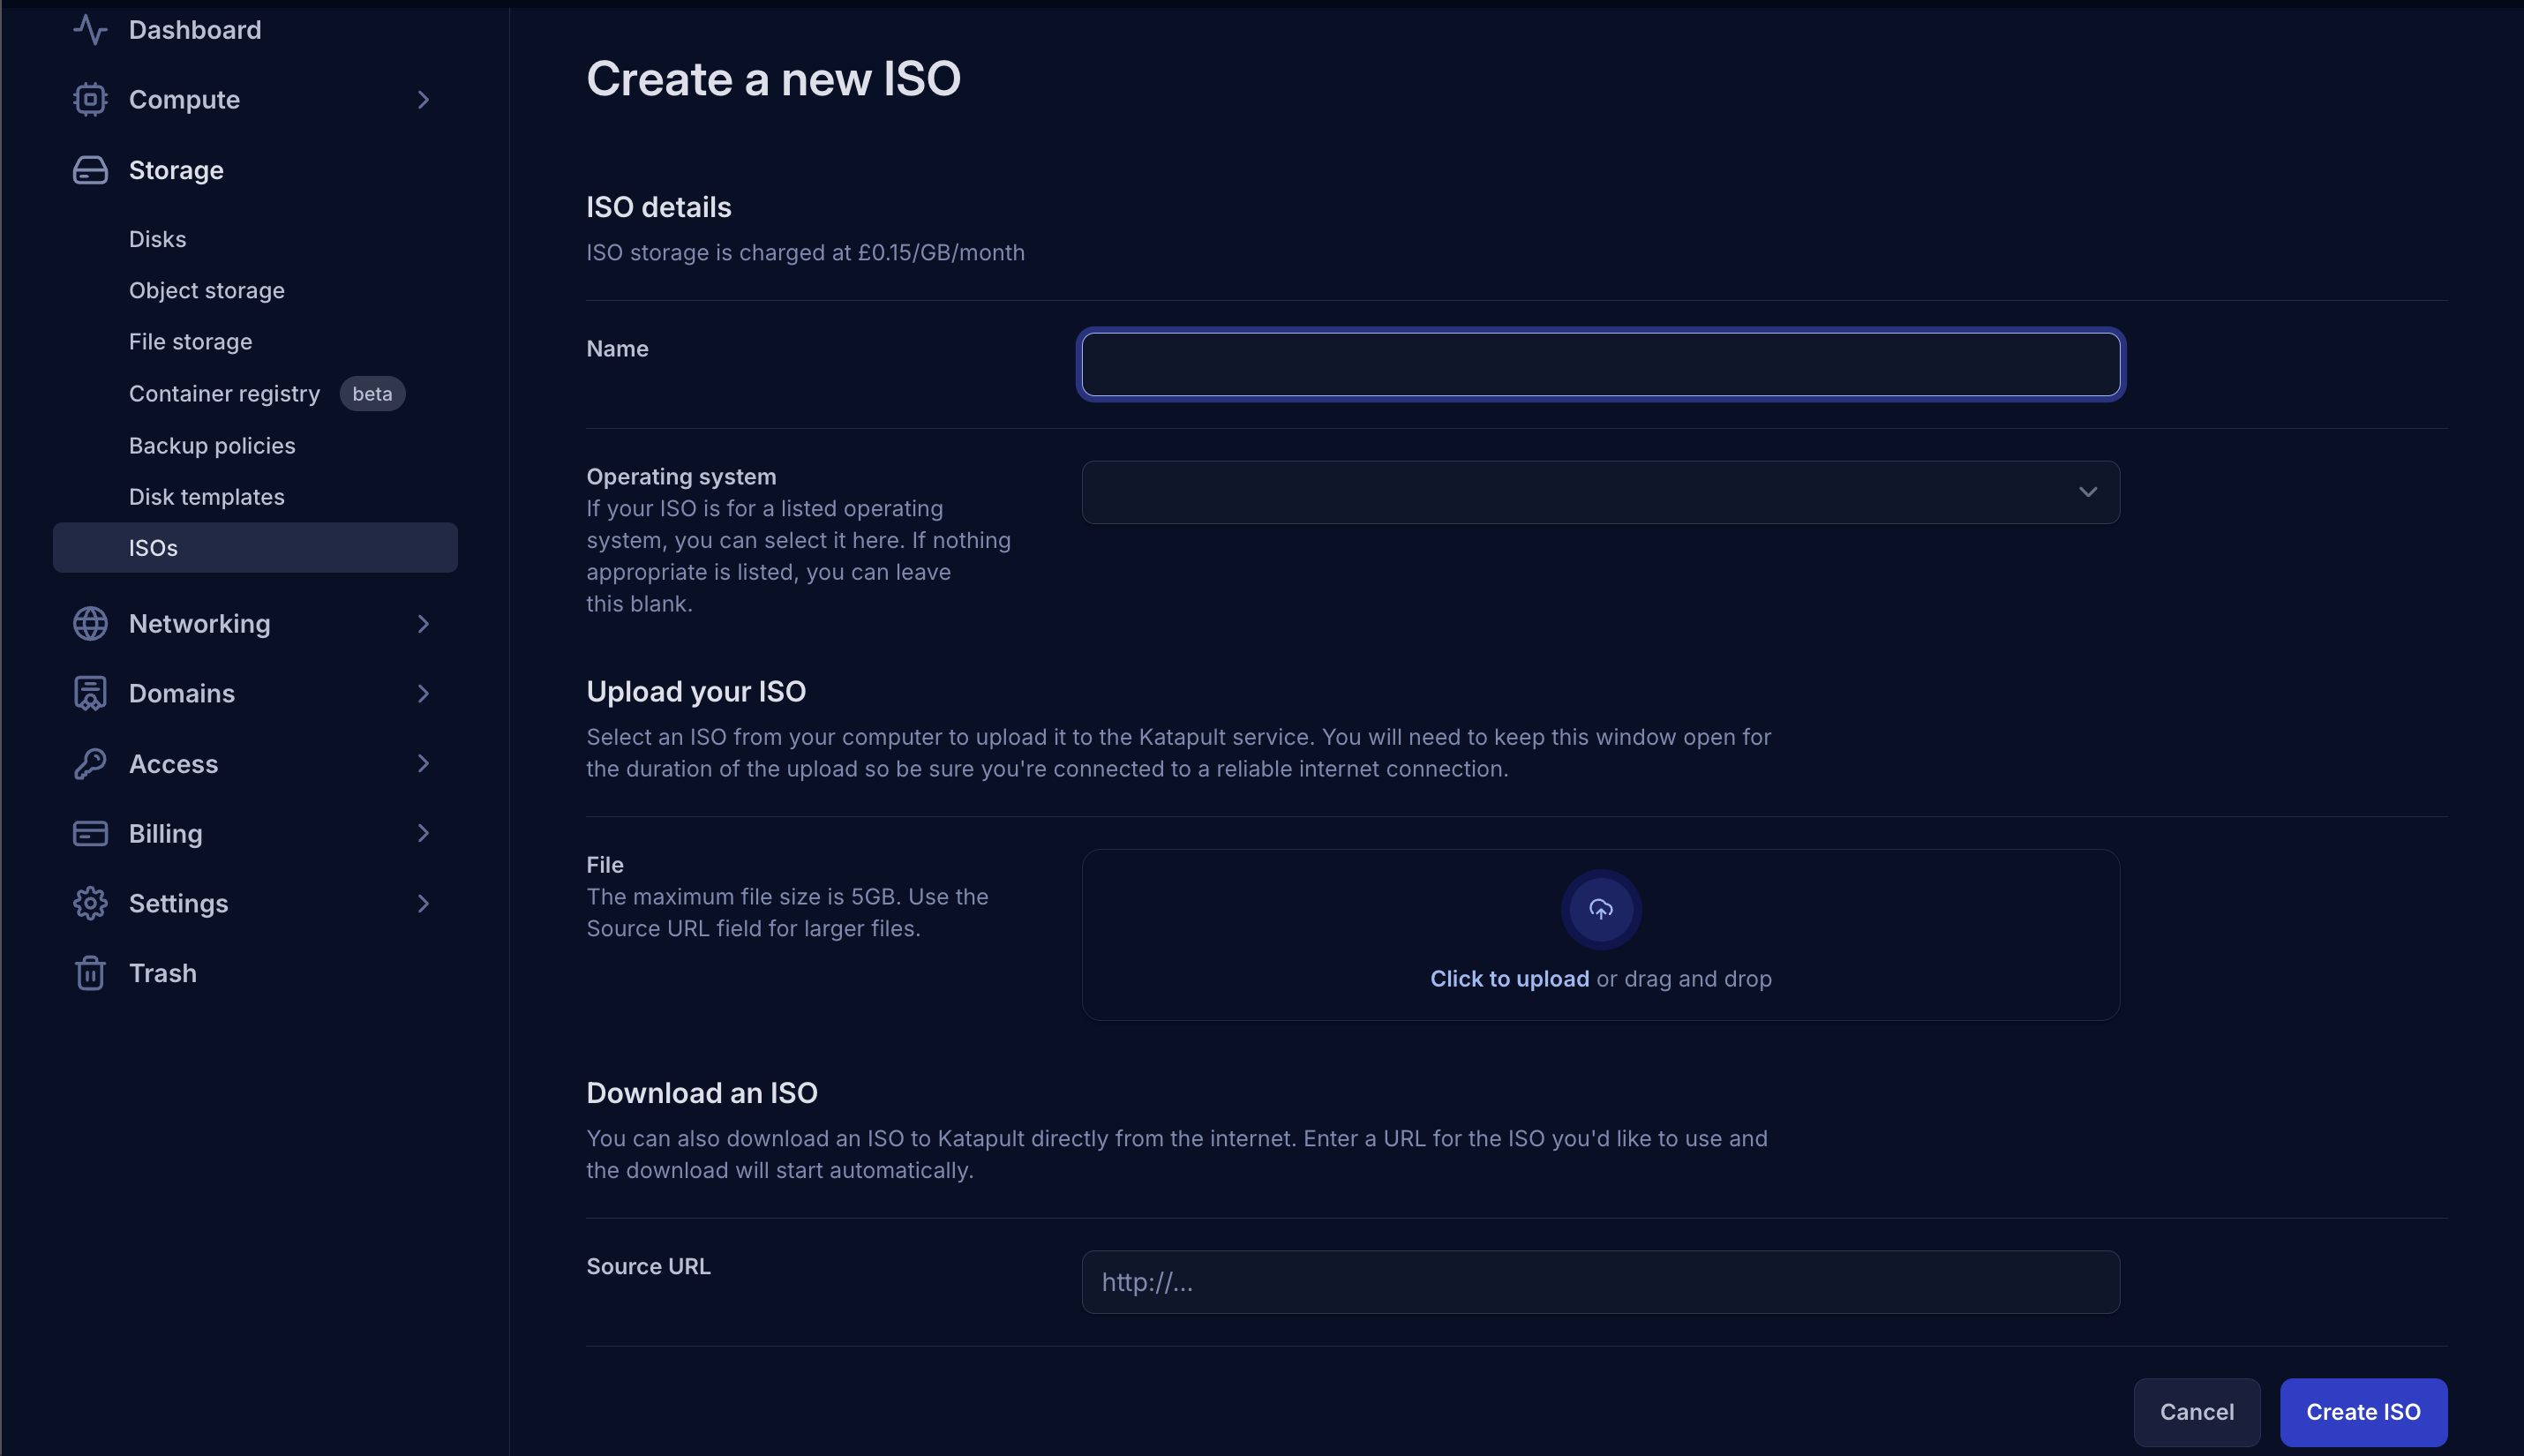
Upload your ISO (from local computer)
To upload an ISO file from your computer:
- In the Upload your ISO section, select Click to upload or drag and drop your ISO file.
- Select your ISO file using the file browser. The maximum file size is 5GB. For larger files, use the Source URL option below.
Download an ISO (from URL)
To download an ISO directly from the internet:
- In the Download an ISO section, enter the direct download URL in the Source URL field.
- The system will download the ISO automatically once you create it.
Complete the ISO creation
For both upload methods:
- Name: Enter a descriptive name for your ISO in the Name field.
- Operating system (optional): If your ISO is for a supported operating system, you can select it from the dropdown. Otherwise, leave this blank.
- Click Create ISO.
The system will process your ISO file, making it available for attachment to virtual machines. Upload time will depend on your connection speed and the ISO file size.
Attach an ISO to a virtual machine
Once you have an ISO in your library, you can attach it to any virtual machine.
Check virtual machine state
Before attaching an ISO:
- Navigate to your virtual machine in the Katapult Console.
- Check the current power state in the virtual machine details.
- Note any existing ISO attachments.
Attach the ISO
To attach an ISO to your virtual machine, follow these steps:
-
From the virtual machine details page, click on the Attach virtual CD/ISO button
-
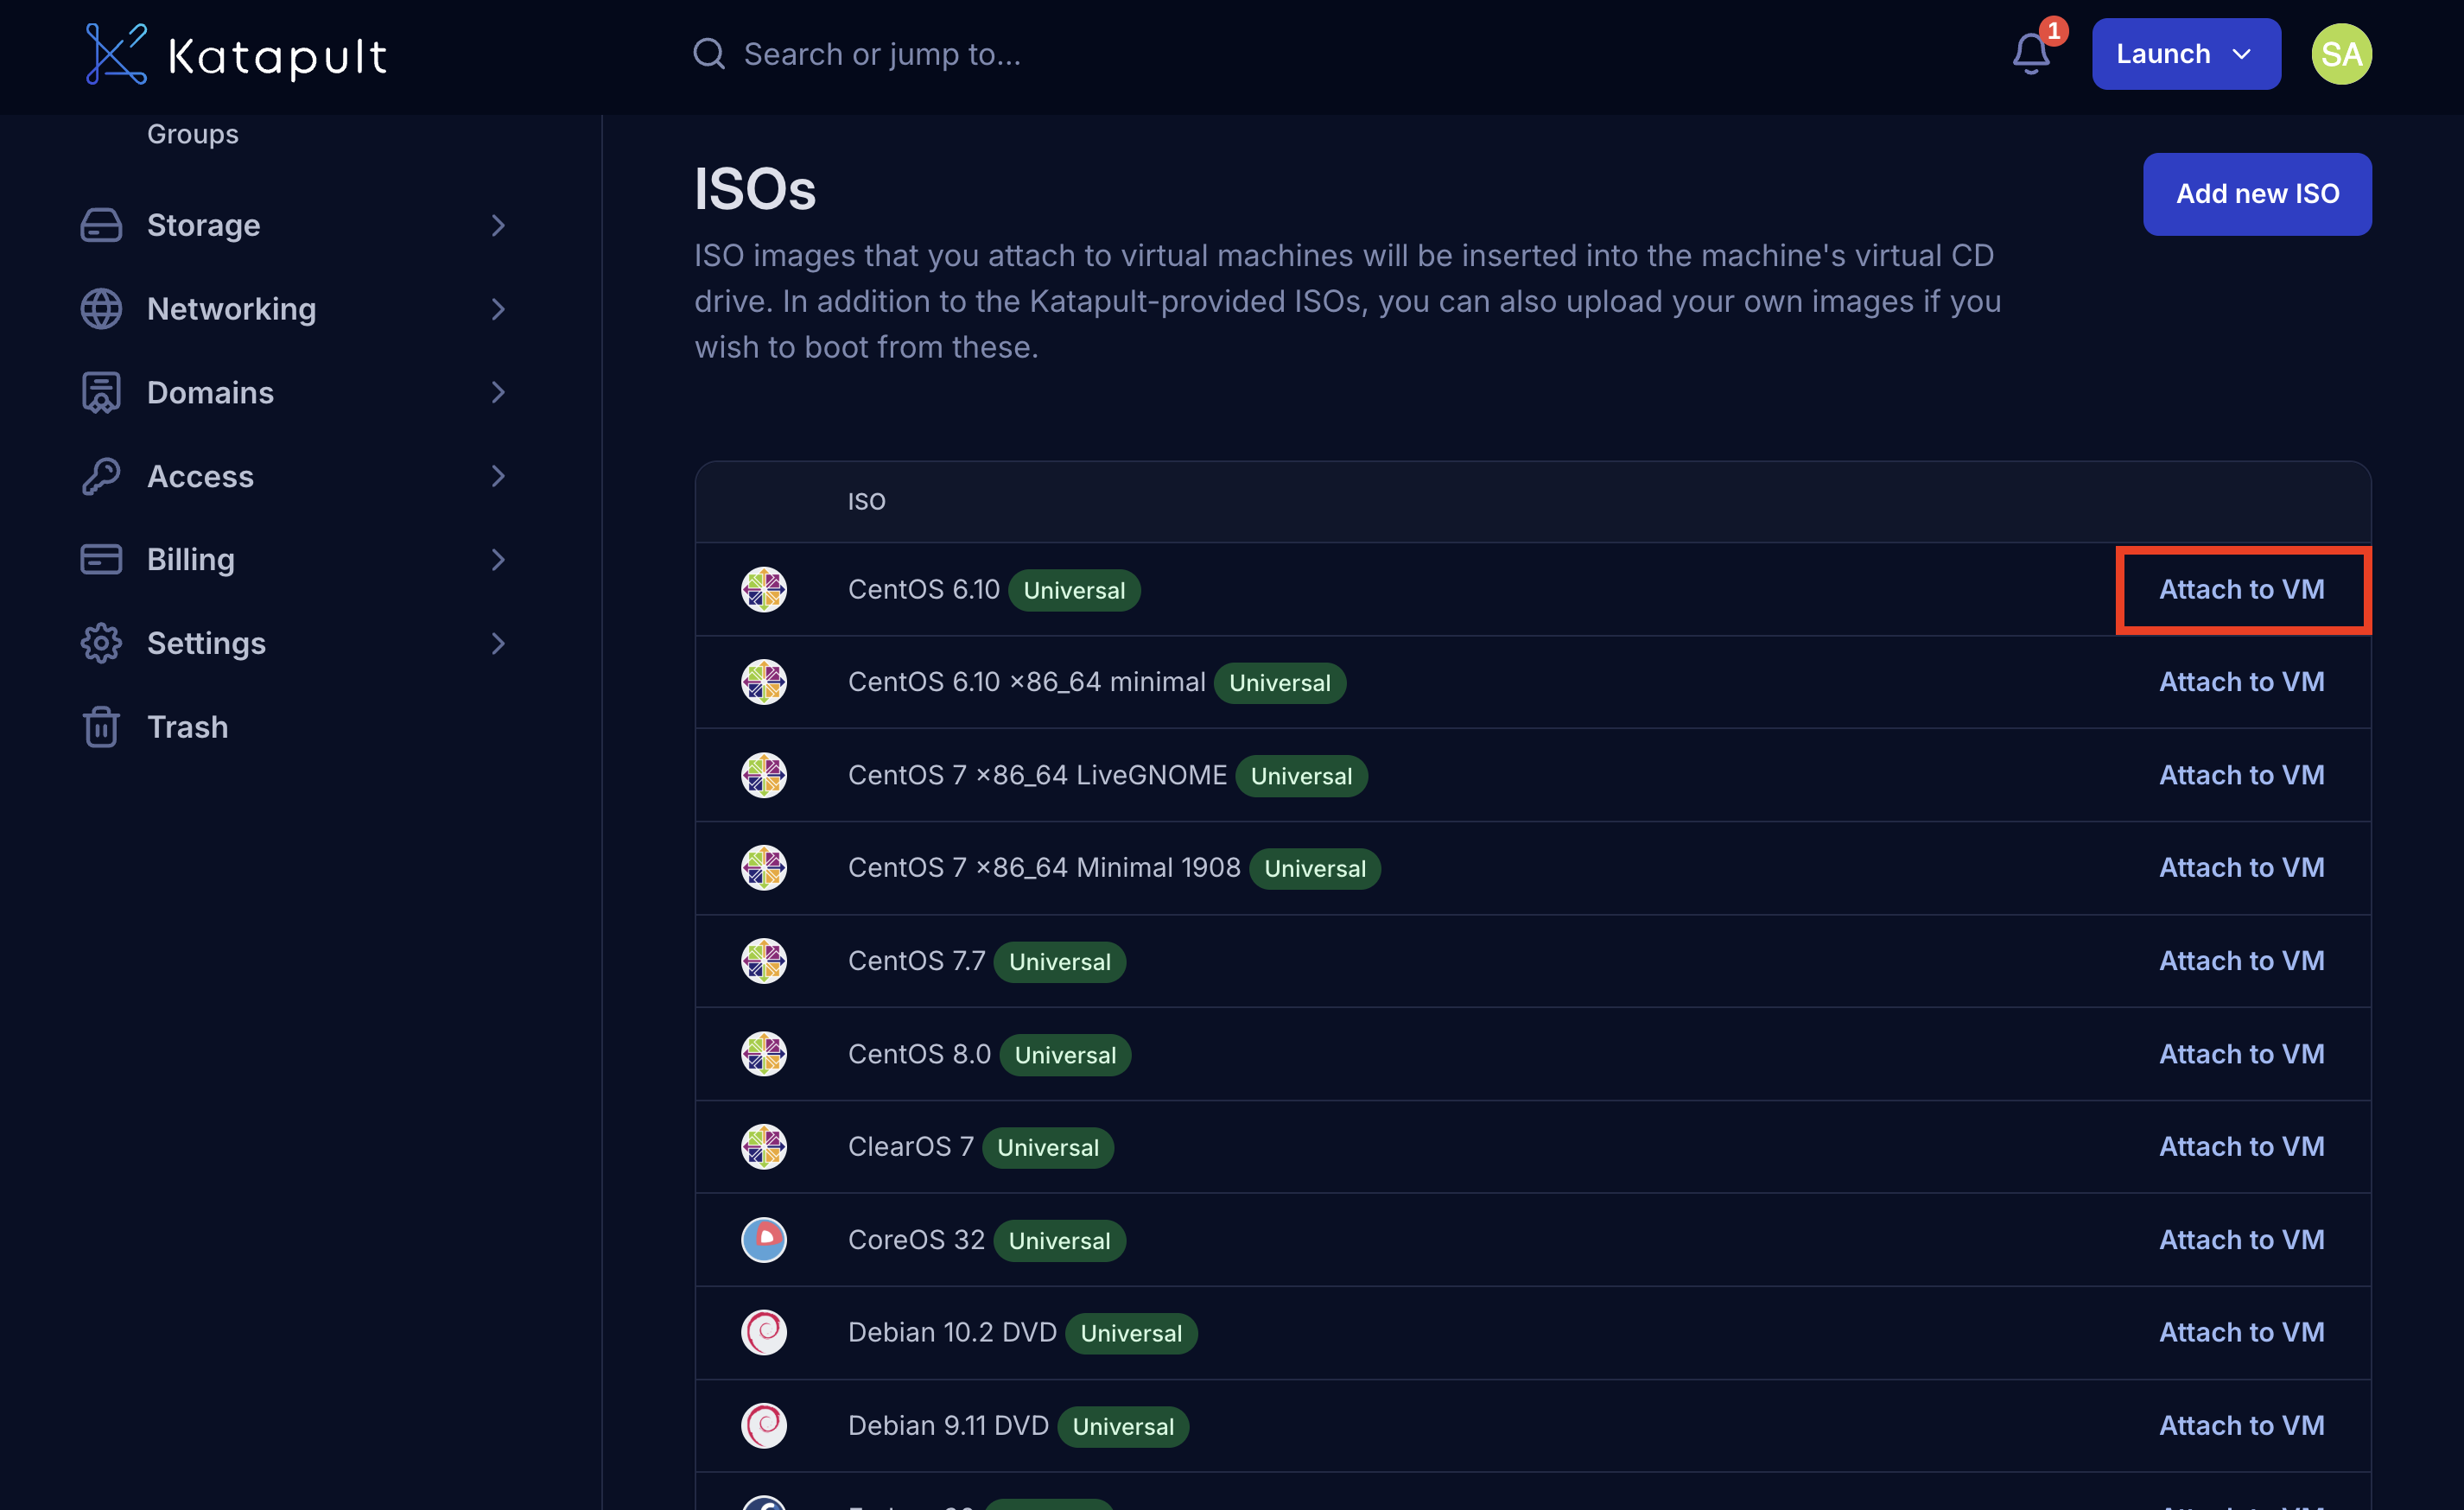
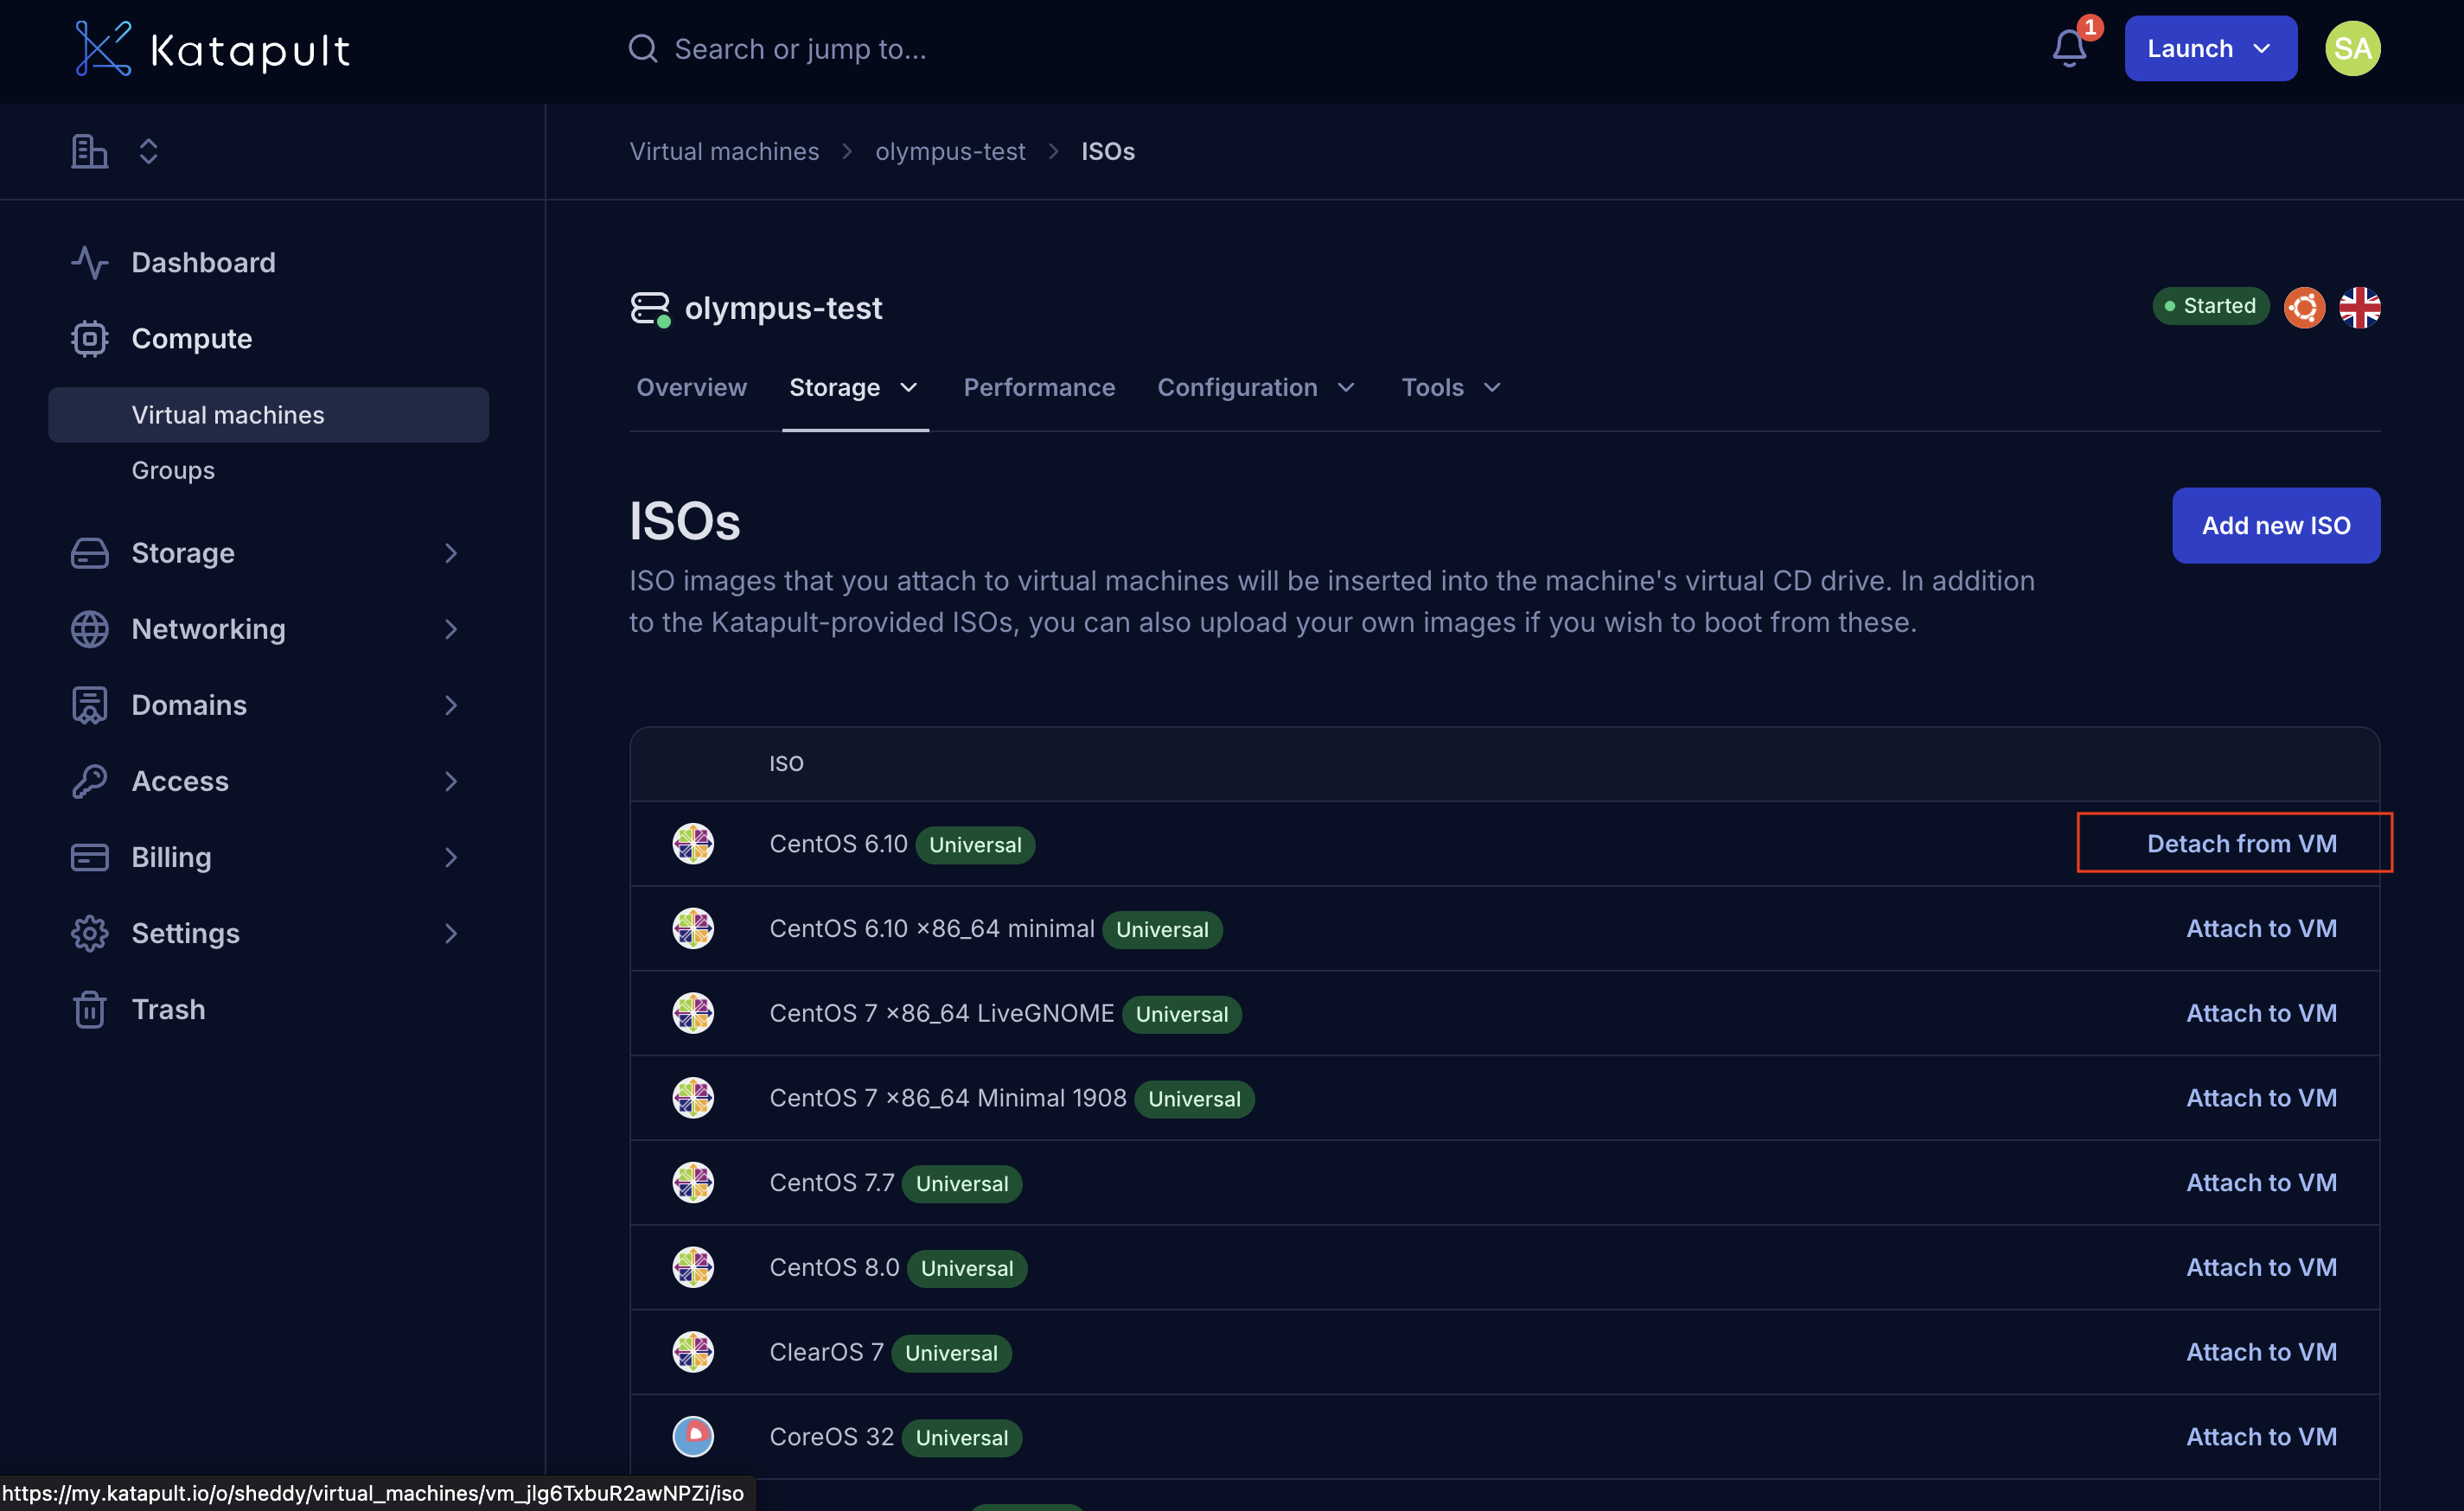
In the ISOs section, you'll see a list of available ISOs and any currently attached ones.
-
Find the ISO you want to attach and click Attach to VM.
- Hot-swap capability: ISOs can be attached to running virtual machines without reboot
- Virtual CD/DVD drive: The ISO appears as a mounted optical drive in the guest OS
- Boot priority: Newly attached ISOs may affect boot order depending on VM configuration
- Read-only access: ISOs are mounted as read-only media
- The attached ISO will now show as attached in the ISOs section of your VM.
Boot from the ISO
To boot your virtual machine from the attached ISO:
- Power off your virtual machine if it's currently running.
- Power on the virtual machine.
- The VM will attempt to boot from the attached ISO.
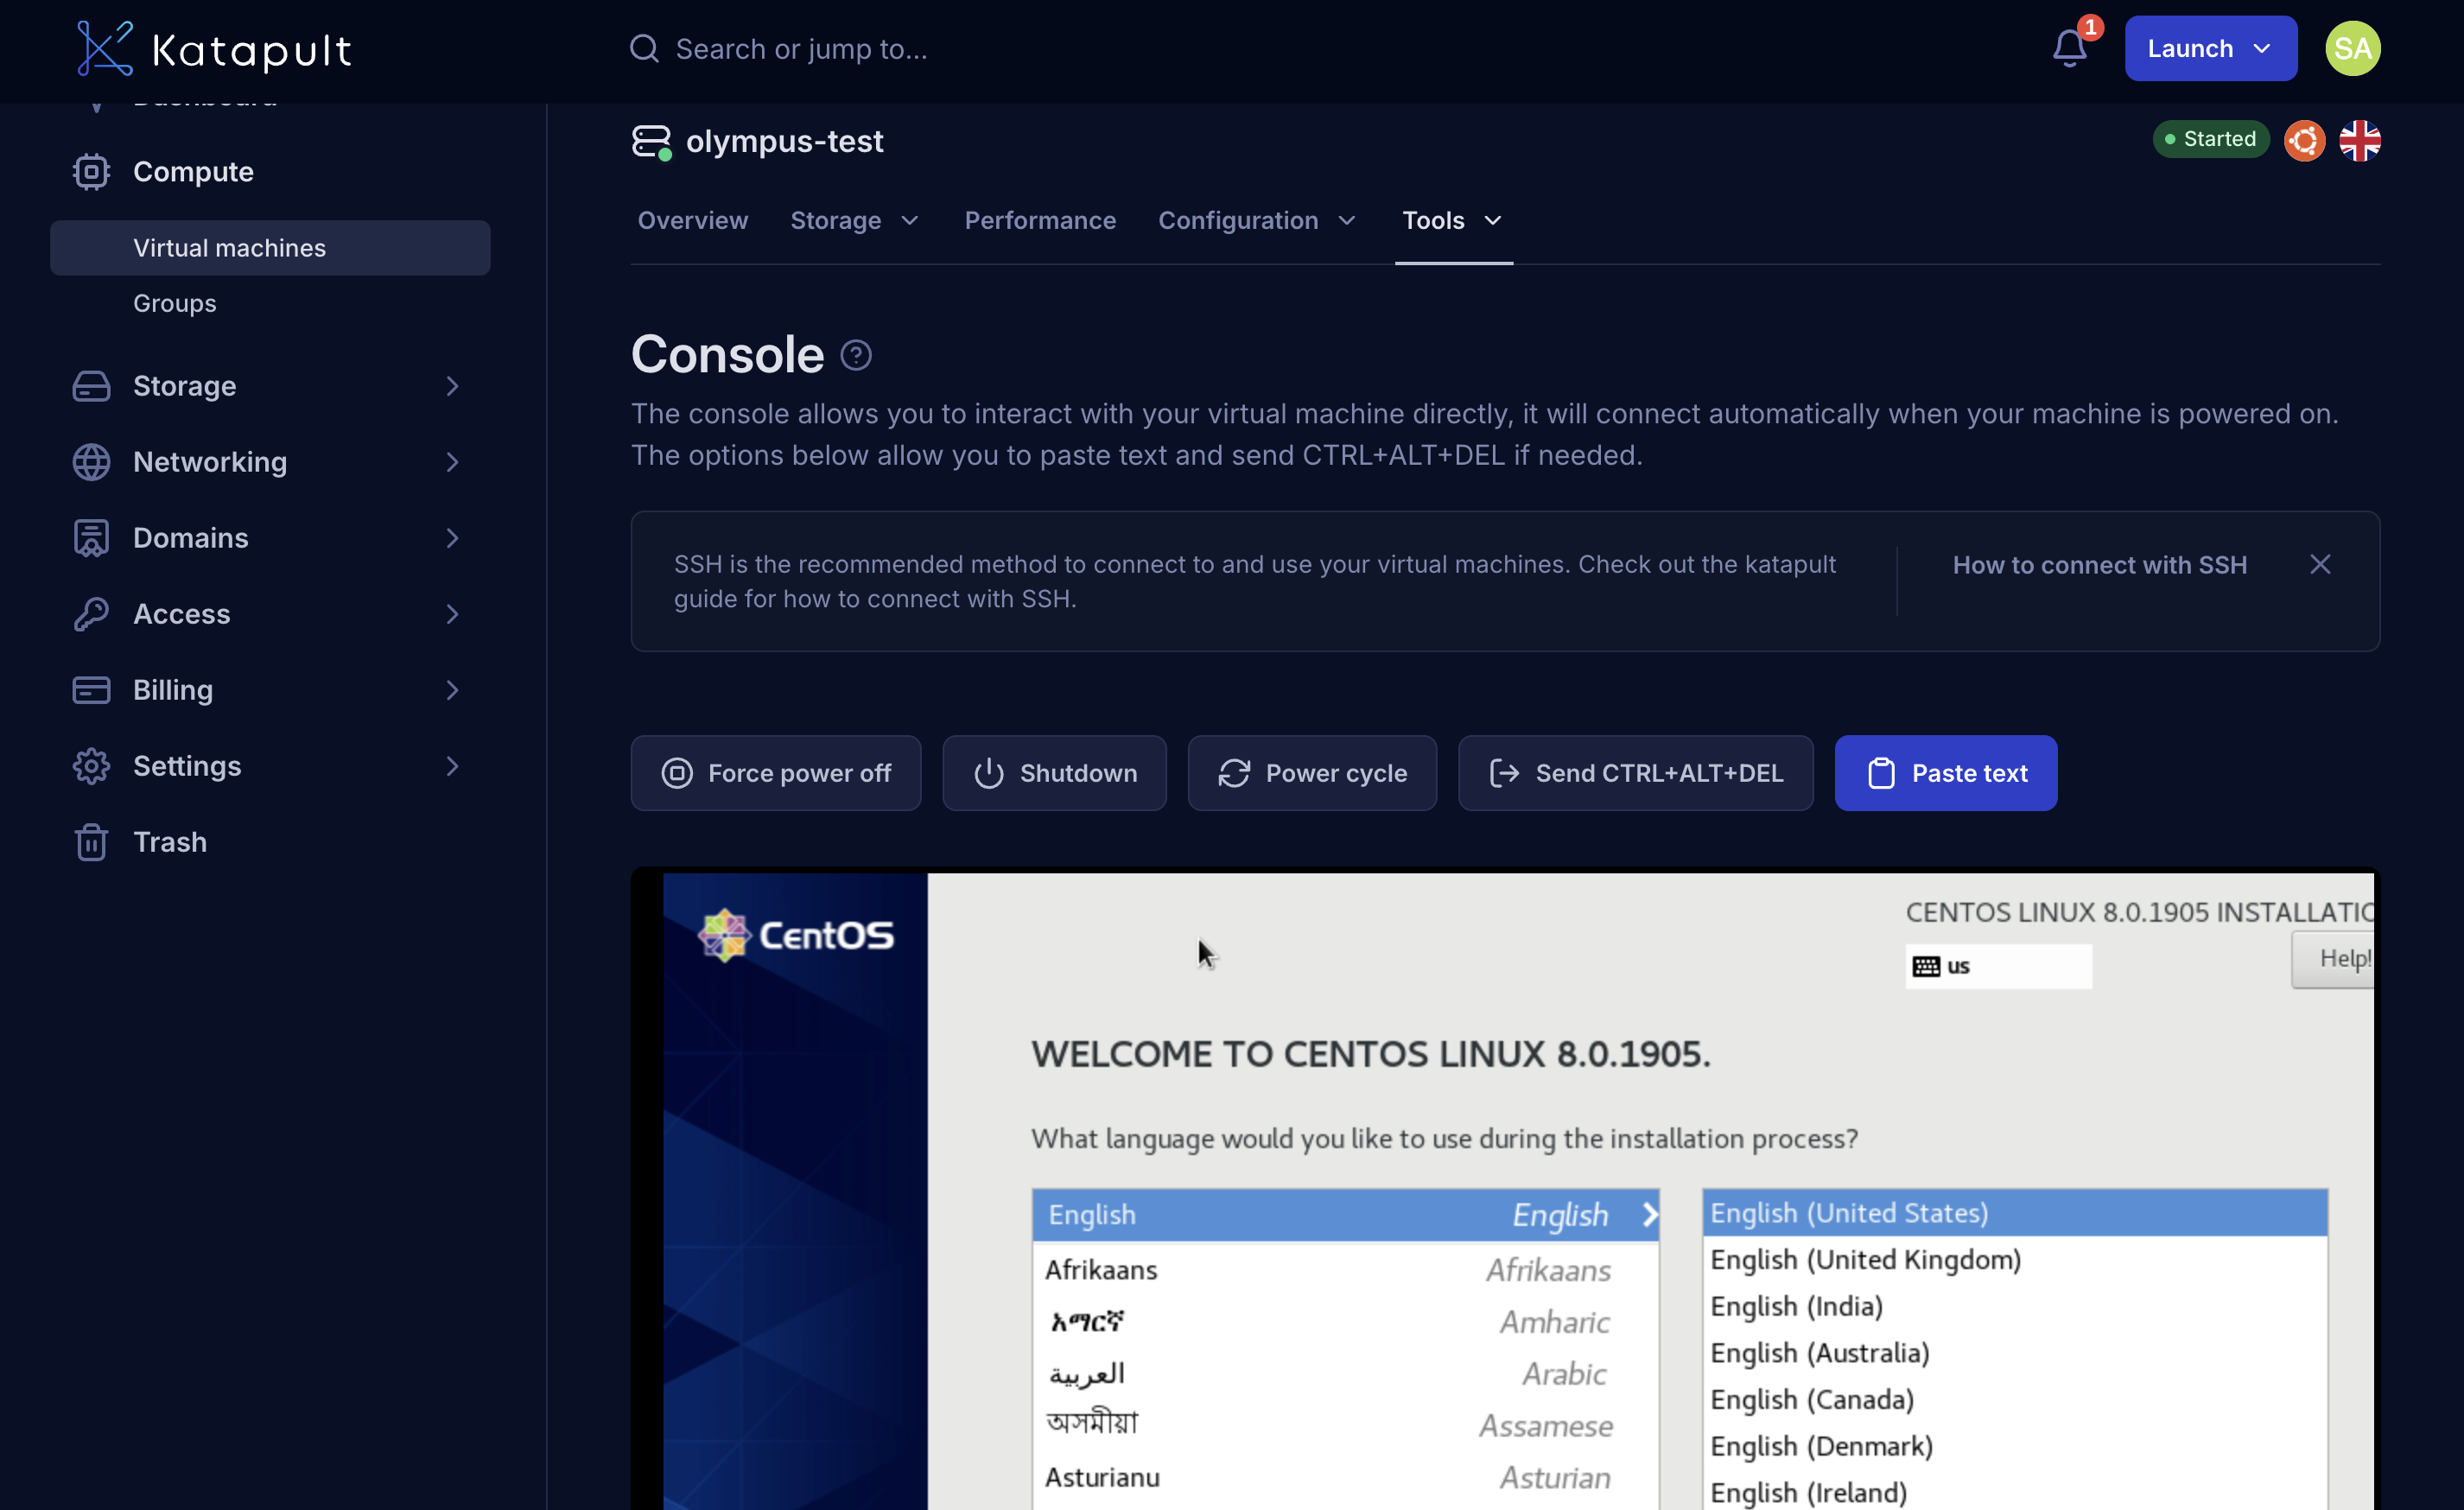
- To interact with the ISO during boot or installation, click Access console from the Actions menu in the VM overview page. This opens the virtual machine console where you can follow the on-screen instructions for your specific ISO.
Detach an ISO
When you no longer need the ISO attached:
-
From the virtual machine overview page, click on the Attach virtual CD/ISO button.
-
In the ISOs section, find the ISO that is currently attached to your VM.
-
Click Detach from VM next to the attached ISO.
- Hot-swap removal: ISOs can be detached from running VMs without disruption
- Drive disappears: The optical drive will no longer be available in the guest OS
- Clean removal: Any running processes accessing the ISO should be stopped first
- Boot order: VM will no longer attempt to boot from the removed ISO
The ISO will no longer show as attached to your virtual machine.
Verification
After attaching an ISO, verify it's working correctly:
- In Katapult Console: Verify the ISO shows as attached in VM details
- In the guest OS: Check that the optical drive is detected
- Boot test: Restart the VM to confirm boot behavior
Your ISO is now ready for use with your virtual machine for installations, recovery operations, or accessing specialized tools and software.